Recover Trash on Mac
Oops! Need to Recover Trash on Your Mac?
Ah snap! You just emptied your trash bin only to realize that something important was in there! Now what do you do? We all have experienced moving something into the trash and emptying it before realizing they are important files. Once this happens, it is easy to assume the contents are gone from the computer. While it might look like the data is completely irretrievable, the reality is that any deleted files whether documents, images, or another type is still salvageable. This information can be retrieved as long as the space where they reside is not overtaken by new data.
What Happens to Emptied Trash?
When you empty the trash bin on a Mac, the operating system deletes the reference address from the table used to locate each file. It might seem as if the information is permanently gone, but this is only because the operating system does not know how to find it anymore. By acting quickly, you can retrieve any trash from the computer and avoid the dilemma of permanently losing data. As long as the files have not been overwritten yet, they may still be retrieved with the appropriate utility.
After trash has been emptied, the space where the file was stored is essentially marked for reuse. Once this happens, it is only a matter of time before new data moves into that spot on the drive. Thankfully, there is a window to regain data before it is removed for good. As long as the old file still resides in the location, you can still retrieve it from the computer or external drive in just a few quick steps. Suddenly, your immense “oops” becomes a simple fix and only a quick change of course during the day.
Trash Retrieval Can Be Easy
With Stellar Mac Data Recovery, it is easy to retrieve deleted trash and you won’t even break a sweat. The utility supports file retrieval on several devices including the iMac, MacBook Pro, Mac Air, Mac Pro, and Mac Minis. By completing only a few simple steps, the files that were removed will be files readily available for viewing and can be saved to any location on your Mac.
First, download and install Mac Data Recovery and then open the program.
Note: If an extended period of time has passed, some data may not be recoverable.
To get your data back, you must complete the following steps with Mac Data Recovery.
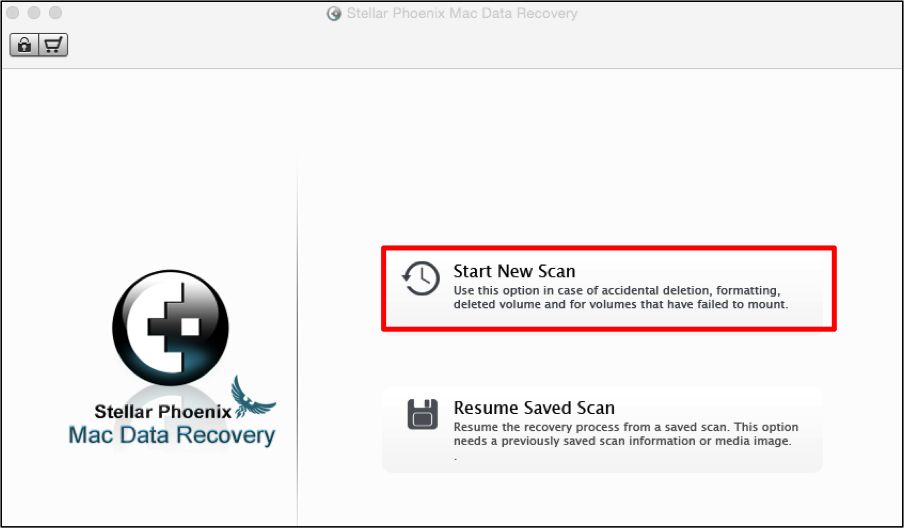
Step 1: You will need to click on Start New Scan to begin. Once this has been done, you will be able to select a volume on the hard drive for scanning and recovery.
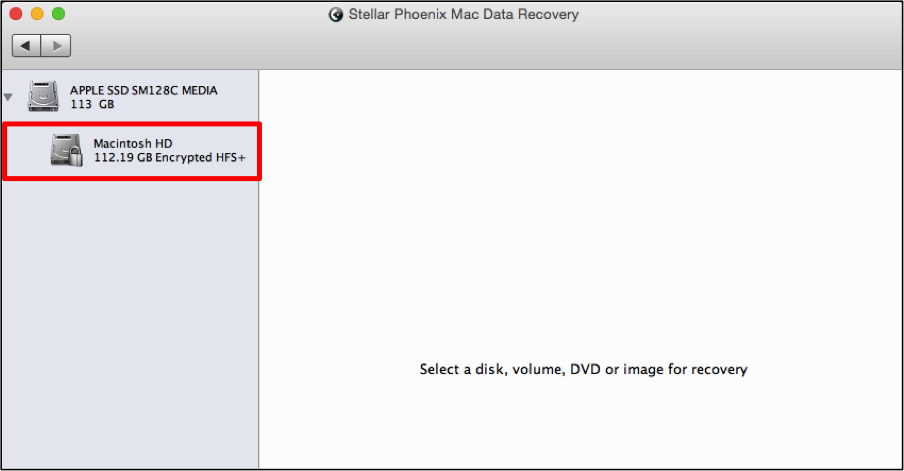
Step 2: Before the utility can be used to recover trash on Mac, the volume you want to scan must be selected. Just click on the appropriate volume in the left panel and additional options will then be provided for recovery.
For Mac computers, Macintosh HD is typically the primary storage volume. We have selected it for the example in this tutorial.
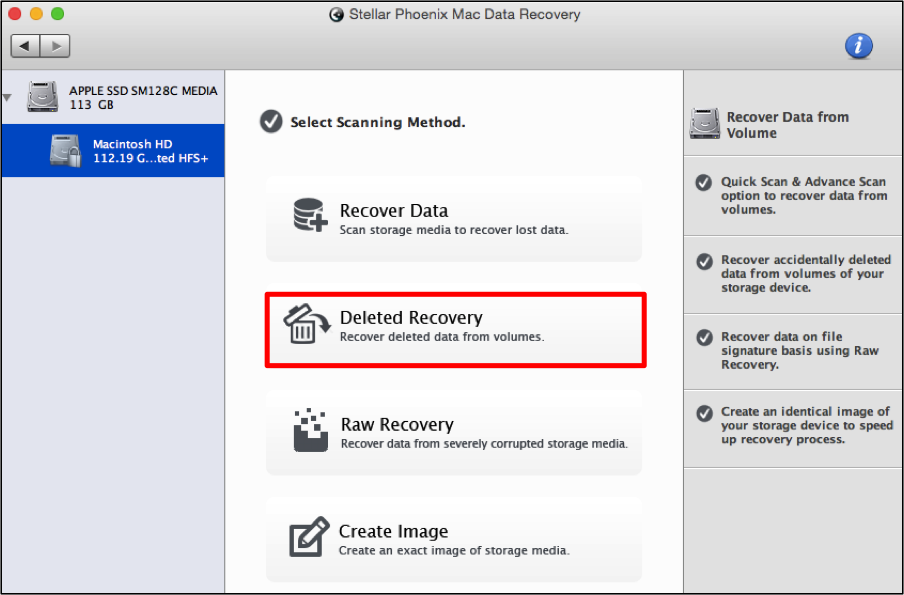
Step 3: After choosing a volume, multiple recovery options will appear on the right side of the screen. The following options are great choices for retrieving trash on a Mac:
- Recover Data (Quick and Advanced) – The quick scan takes less time to complete but may find everything you want to recover. An advanced scan is also provided when choosing this option.
- Deleted Recovery – A deep scan capable of locating the most hard-to-find files. Please note that this scan takes more time to complete.
To complete this tutorial, click on the Deleted Recovery option. This type of recovery scans unused blocks of volume to locate deleted files and is the best choice for retrieving trash on your computer.
Step 4: Once you have selected a volume, click on Start Scan to begin scanning for files to recover.
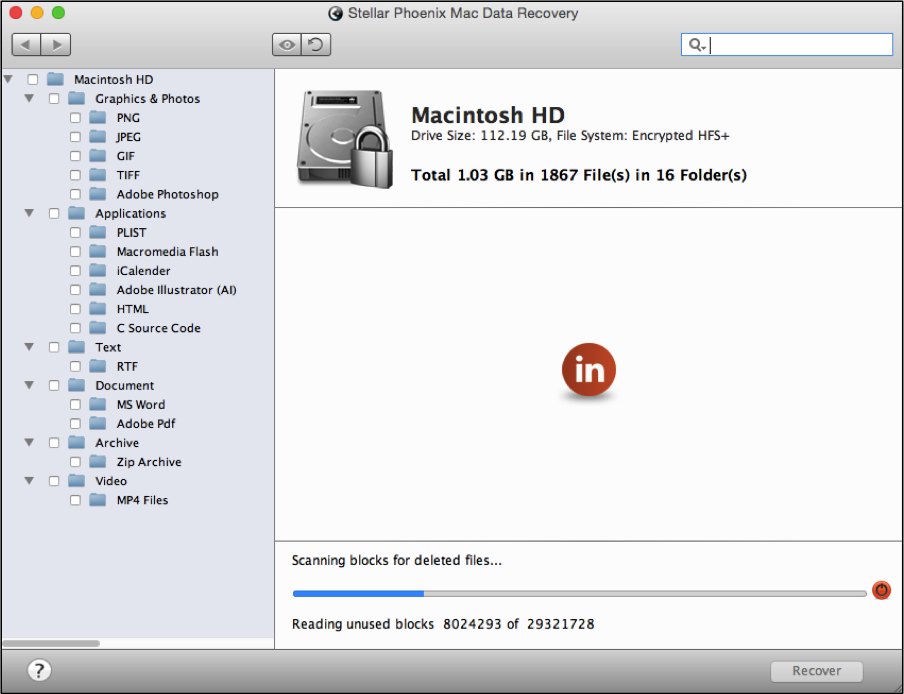
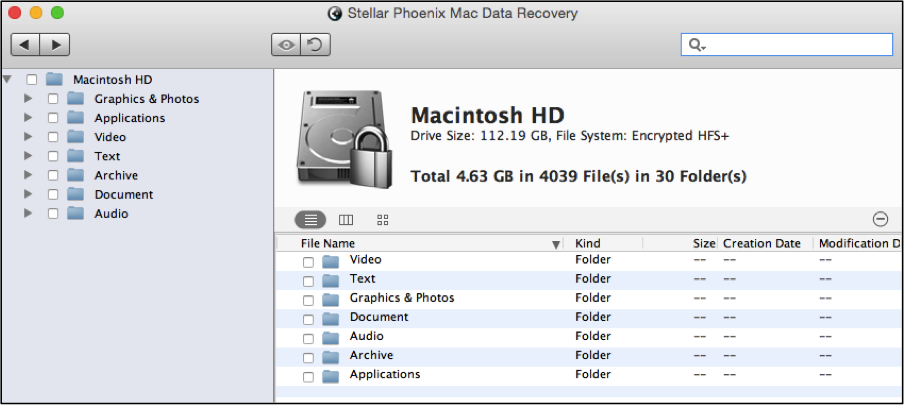
As the scan progress, the left panel will begin to populate with folders in a tree view, as shown below:
Note: A confirmation message is provided to show that the scan was successful.
Step 5: Files displayed in the scan results default a tree view consisting of specific types of files such as Applications and Document.
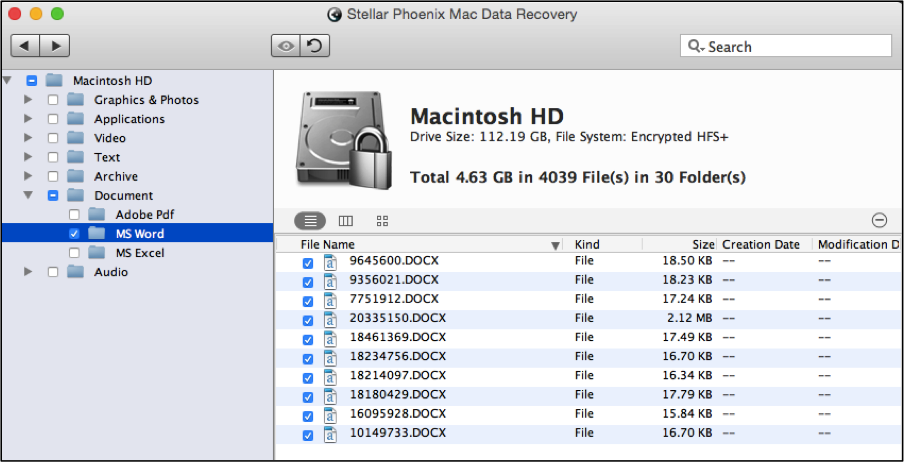
To see what can be recovered for a specific file type, click on a folder in the tree view or on the right side of the screen. Check the box next to a folder or each individual file that needs to be retrieved.
If a folder has a checkmark, then all files in that folder will be recovered. However, you can expand these folders and select a type of file such as Document > MS Word to customize the trash retrieval.
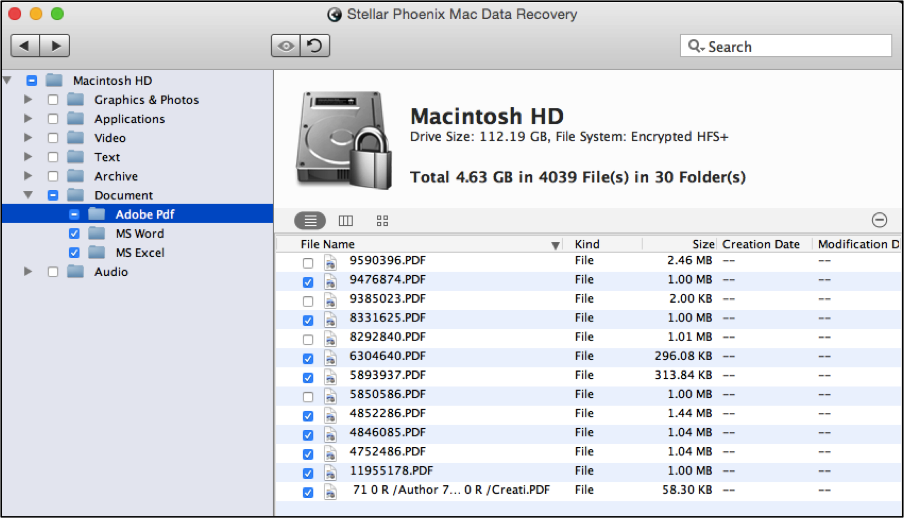
On the right side of the screen, you will be able to select individual files for recovery. First, click on the file type in the left panel and then tick the checkbox next to each file in the File View (right side). In the example below, specific Adobe PDF files have been chosen.
Make all desired selections and then click on Recover to continue to the next step of the trash recovery process.
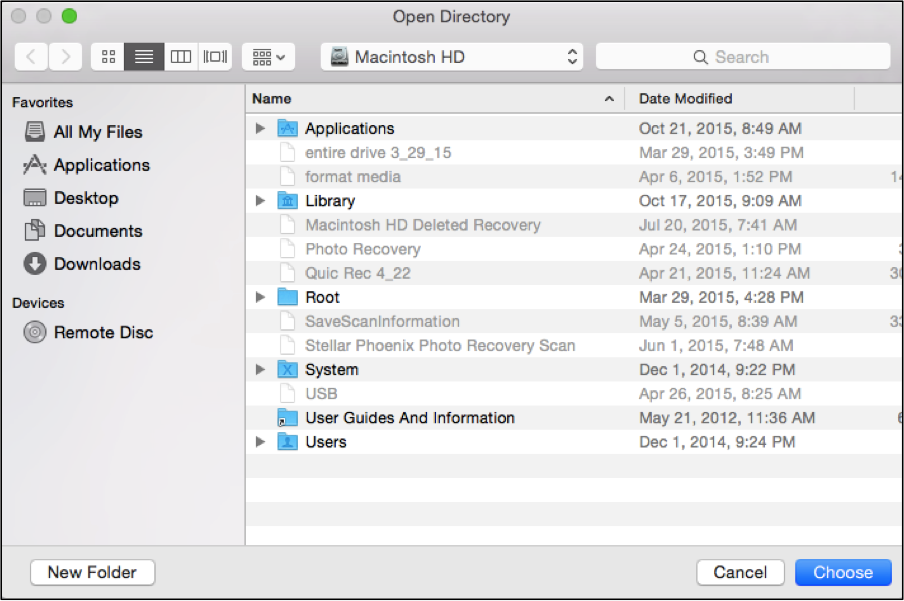
Step 6: In order to finish the recovery, a save location must be configured on the computer or an external device (if connected). Browse to the location where you want the recovered files to be stored and then click on Choose.
As shown in this tutorial, you can easily recover trash on Mac even if it appears to be gone. Simply follow the tutorial above and perform these steps to retrieve deleted trash items on your Mac:
- Start a new scan.
- Select the volume to be scanned.
- Choose a recovery option and scan the volume.
- Pick the folders and/or files to be recovered.
- Configure a save location.
- Recover the data.
If files are accidentally deleted from your trash can, the most proactive thing you can do is to immediately stop making changes. Then install Stellar Phoenix Macintosh Data Recovery and perform the steps outlined in this tutorial. There is no need to stress as long as you quickly take action to recover any lost information.

