Photo Recovery on Mac
Need a User-Friendly Utility for Photo Recovery on Your Mac?
It’s happened to all of us at least once: either photos are accidentally deleted or lost due to an unexpected catastrophe such as a failed hard drive or sudden power outage. Whatever the reason, loss of these important memories and images can seem like a downright catastrophe! However, do not fear because these items are retrievable when you use a dependable photo retrieval program.
Stellar Phoenix Mac Data Recovery software provides an easy-to-use interface with the right mix of features for fast and reliable photo retrieval. All you have to do is download the Macintosh version and install it. Within minutes, you will be able to locate any deleted photos from a selected volume on a Macintosh hard drive and restore them with ease. This utility is compatible for these Macintosh devices:
- Air
- iMac
- MacBook Pro
- Mac Pro
- Mac Mini
Stellar Phoenix Mac Data Retrieval can salvage photos on your primary hard drive or even external devices when needed. For a simple photo recovery, all you need to do is open the utility, choose the appropriate retrieval mode, and let the tool do its handy work.
Free Trial
Salvage Your Photos in 5 Easy Steps
Complete the following steps after installing to perform photo recovery on Macintosh and save your photos from permanent deletion.
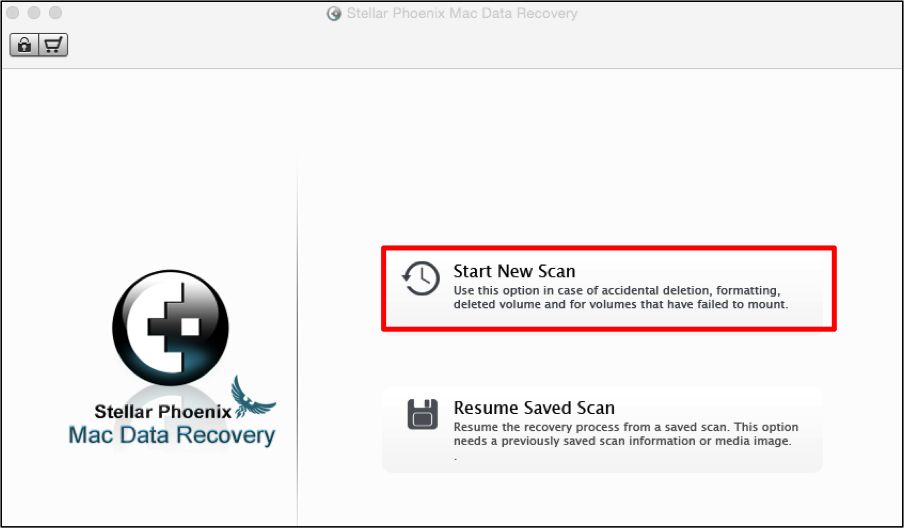
Step 1: Click on Start New Scan to select a drive for scanning and retrieval.
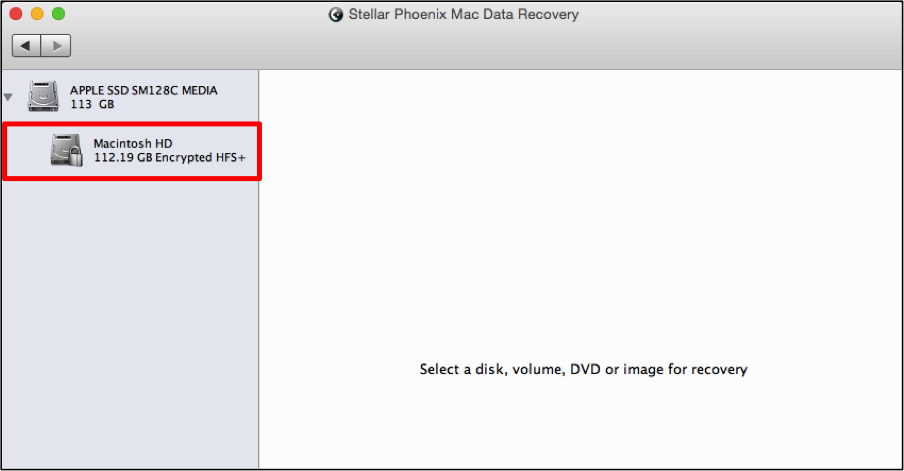
Then select a hard drive media source for the Mac Data Retrieval utility to scan. In this tutorial, we will be using Macintosh HD as shown in the example below:
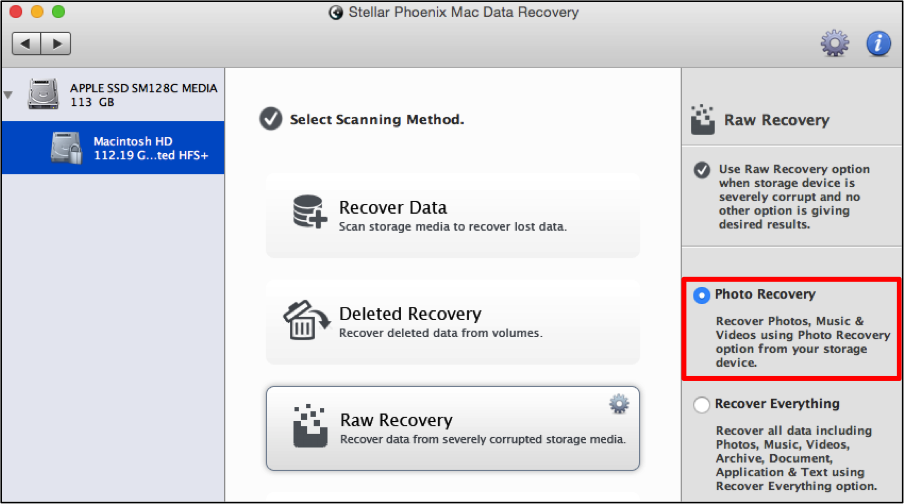
Step 2: Next, you will need to click on Raw Recovery and then select the Photo Recovery option. This is the best option for retrieving lost or deleted photos on a Mac.
Note: Every time you make a change on your Macintosh, there is a potential for deleted data being overwritten. To ensure photos can be retrieved, immediately stop working on the Mac and run the retrieval process with this utility.
At this point the scan has not initiated. You will need to click on the Start Scan button at the bottom of the screen to begin looking for recoverable photos.
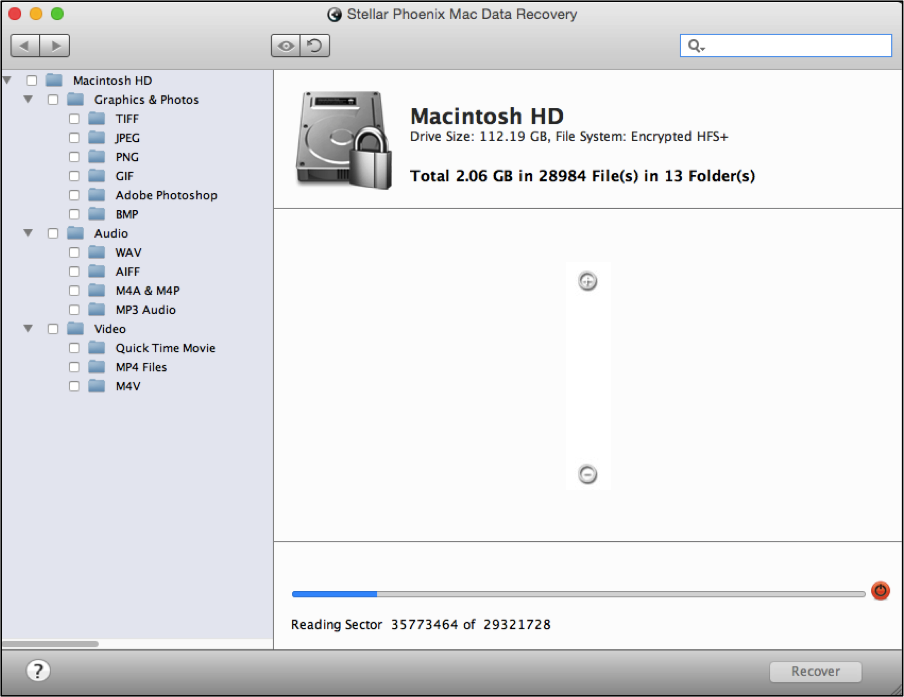
The scan takes a little while to finish and the required time varies depending on the size of the media source being scanned. As this process occurs, the utility will appear similar to the screenshot below.
You can abort this process at any time by clicking on the abort scan button, which is the red circle next to the progress bar.
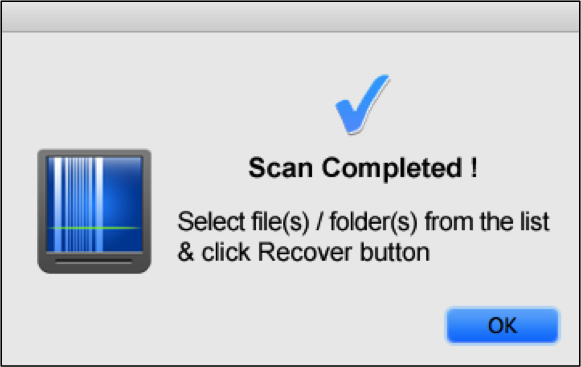
A confirmation message is provided to show the scan has completed successfully. You must click on OK to close this message and start selecting items for retrieval.
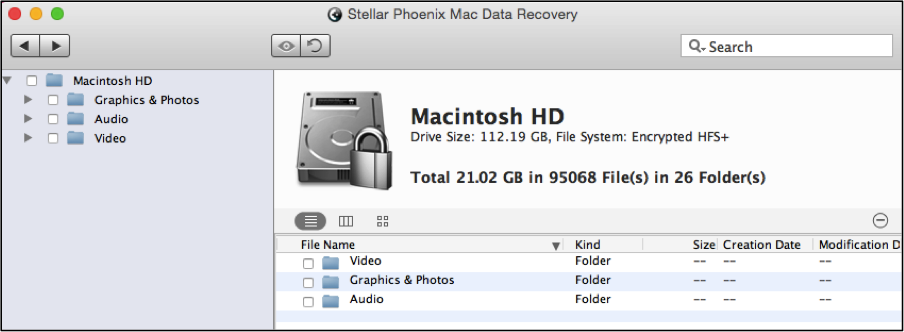
Step 3: Now you will need to select the photos, file types, or all items found for recovery. Scan results are shown in a tree view and separated into directories based on the type of media and format.
When performing photo recovery on Macintosh with the Mac Data Retrieval program, you have three options for selecting files:
- Choose all photos located by the utility.
- Select specific photo types (JPEG, TIFF, PNG, etc.).
- Mark individual items for retrieval.
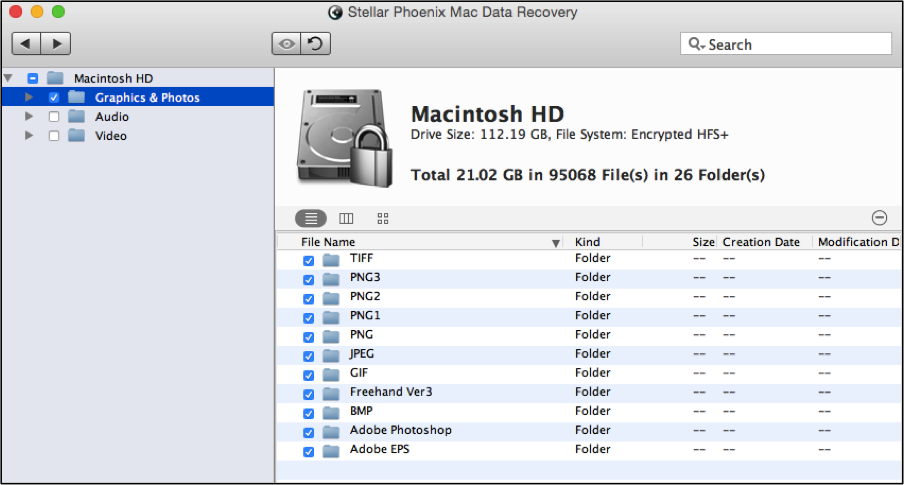
Use the tree view to maneuver between the found items and tick the checkbox next to each directory or file you want to recover. To recover all photos, simply place a checkmark in the Graphics & Photos directory, as shown below:
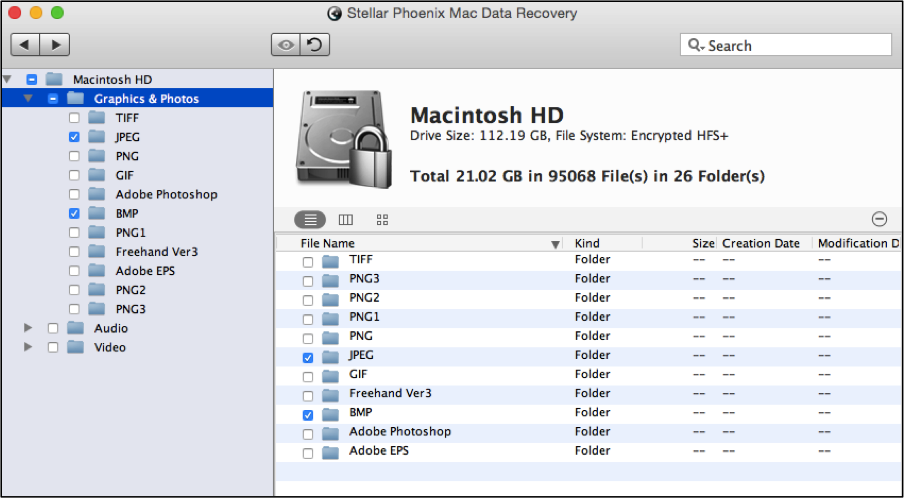
(Or) Select specific formats by checking the box next to each type on the right side of the application. For example, if you want to recover only JPEG and BMP files, then you need to check those two folders within the Graphics & Photos directory.
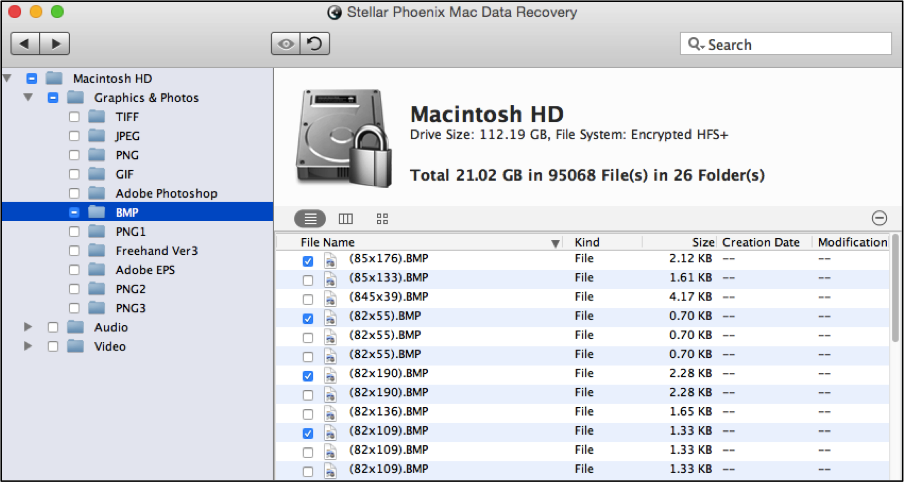
You may also choose each file individually by clicking on one of the photo type options such as BMP and then checking each desired file on the right side of the application. The following example shows multiple files selected in the BMP directory.
Step 4: To finish retrieving your files, you will need to click on Recover. The recover button can be found in the bottom right corner of the application.
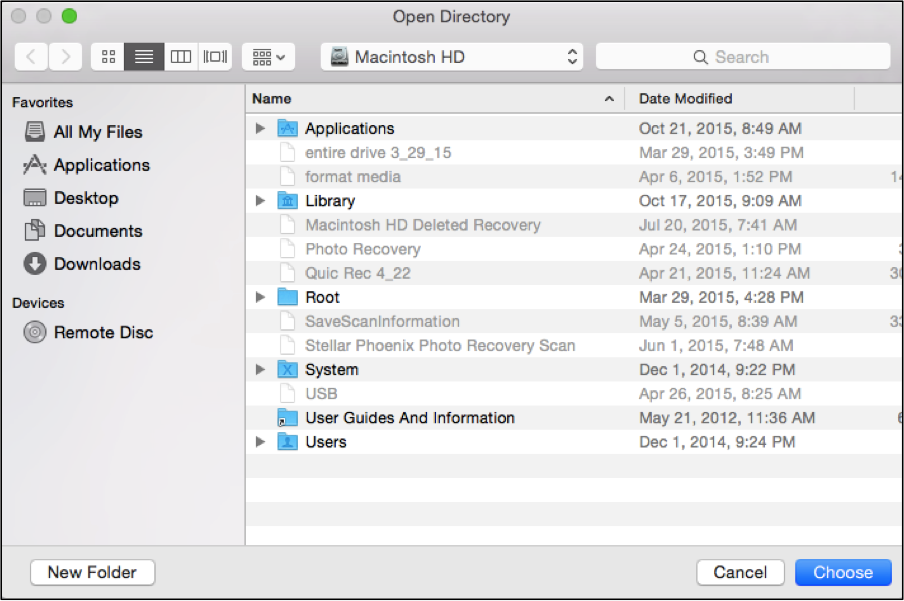
Step 5: Before the recovered photos may be saved, you must choose a location on your Macintosh. This location will be used to store a folder called “Root”, which is automatically created by the utility. Once this is done, the Mac Data Recovery utility will finish the retrieval process.
So you had a big ‘oops’ or maybe a little one, it’s no big deal as long as the right utility is used. Deleted and lost photos are completely retrievable on your Macintosh! All you need to do is complete these steps with Stellar Phoenix Mac Data Recovery:
- Choose a media source to scan.
- Select a mode for retrieval.
- Wait for the scan to locate available files.
- Check the box next to each desired photo or directory.
- Choose a save location and let the utility do the rest.
It is too easy to get upset thinking your photos are permanently gone. However, if you react quickly and use Stellar Phoenix Mac Data Retrieval software, then it is a simple problem to fix!
Free Trial

