Mac Photo Recovery Software
Rescue Precious Moments in Minutes with Mac Photo Recovery Software
Mac photo recovery software provides an easy solution in instances where images or other media have been accidentally removed or lost on your hard drive or an external device. What exactly is this software and how does it help? For simplicity, any photo you remove from a Mac, whether intentionally or unintentionally, is not physically deleted. Instead, its address is removed from the table used by the operating system to locate these items. As long as the physical sector on the drive has not been overwritten with new data, your photos are safe and readily available for retrieval.
Mac photo recovery software performs the necessary tasks for locating and retrieving these items from your hard drive or an external device. It takes only minutes to complete the retrieval and afterwards these items will show up as if they have never disappeared. Stellar Phoenix Mac Data Recovery is an exceptional tool for this type of file retrieval as it provides a simple mode for locating lost or deleted media such as:
- Photos
- Videos
- Audio Files
- Graphics
All you need to do is download this utility and follow the provided steps to salvage these items before they are truly gone.
How to Recover Your Photos
Before starting recovery, make certain the utility has been installed appropriately and is running. You will also need to connect the device to the computer if scanning an external drive.
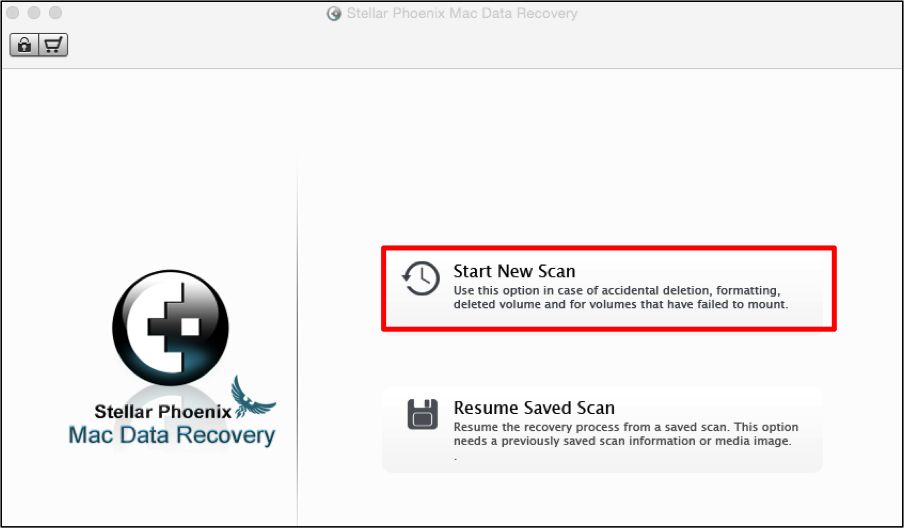
Step 1: To begin retrieving your photos, first select Start New Scan on the main application screen.
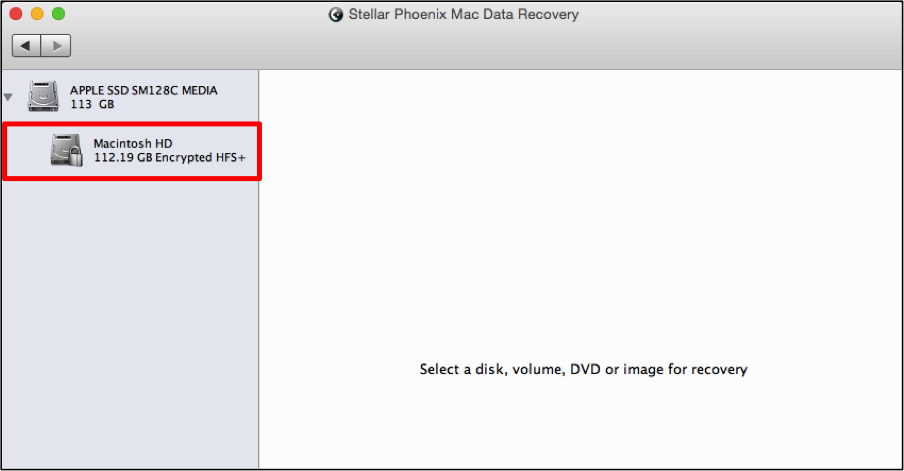
The next step involves selecting a media location on the drive for the utility to examine. While you may have many choices, we are keeping it simple by choosing Macintosh HD for this tutorial. This media source is one of the most common when using a Mac device.
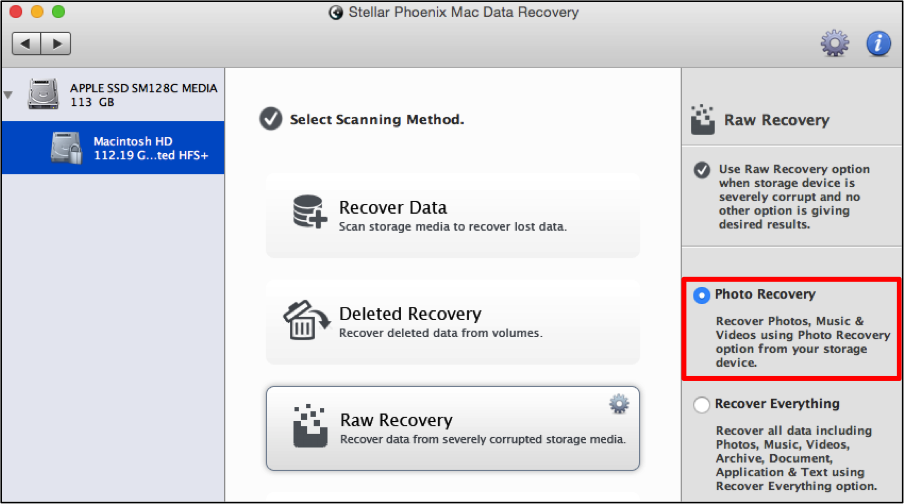
Step 2: You will have to proceed in clicking Raw Recovery and choose the Photo Recovery option. This option may be used to retrieve lost and deleted photos from any Mac drive.
Note: If you are attempting to recover photos that were deleted over an extended time period such as several months, they may not be retrievable. As you continuously make changes on the Mac drive, there is a greater risk of overwritten data on the physical storage location where the photo(s) reside.
In order for the retrieval process to begin, you will need to click on Start Scan found at the bottom corner of the screen.
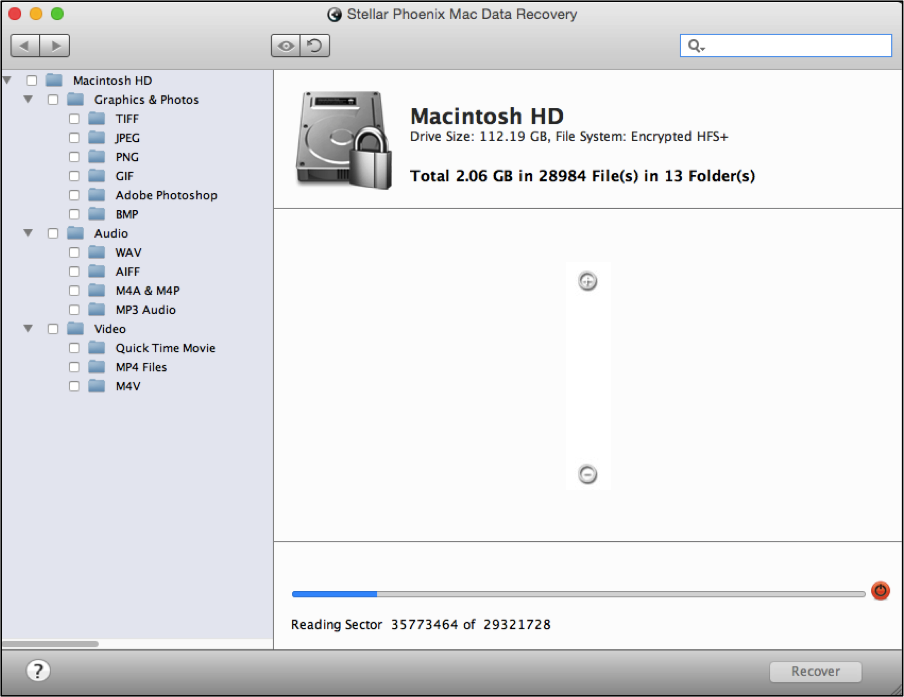
The utility will need some time (up to an hour) to complete the scan and will appear as shown below during this process. You can use the abort button (red circle) located next to the progress bar to end the scan if needed.
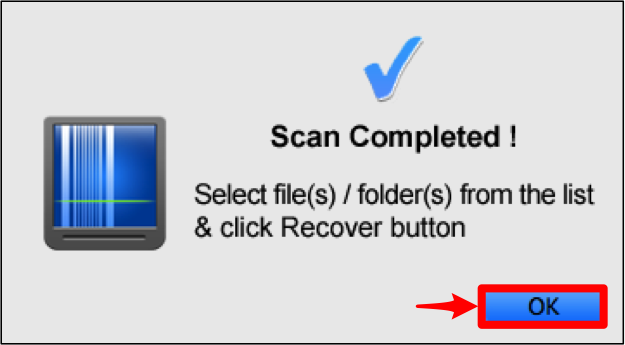
The following confirmation message will be provided once scanning has successfully finished. You will need to click on OK to close this popup.
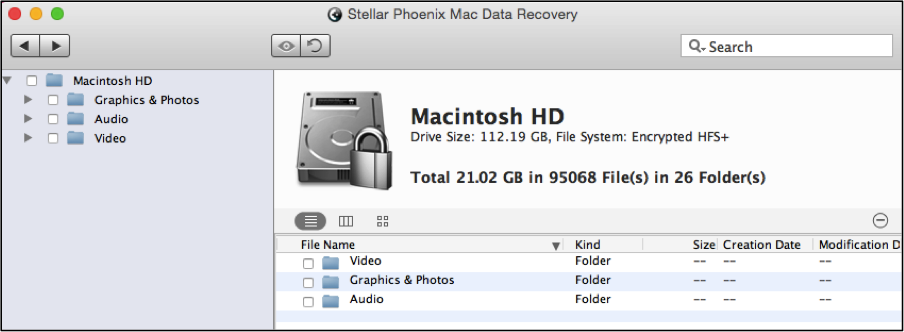
Step 3: For deleted photo recovery, you have the option to recover every located photo, select just specific file types, or choose distinct files. Provided results are separated by media and file type to make this process as easy as possible.
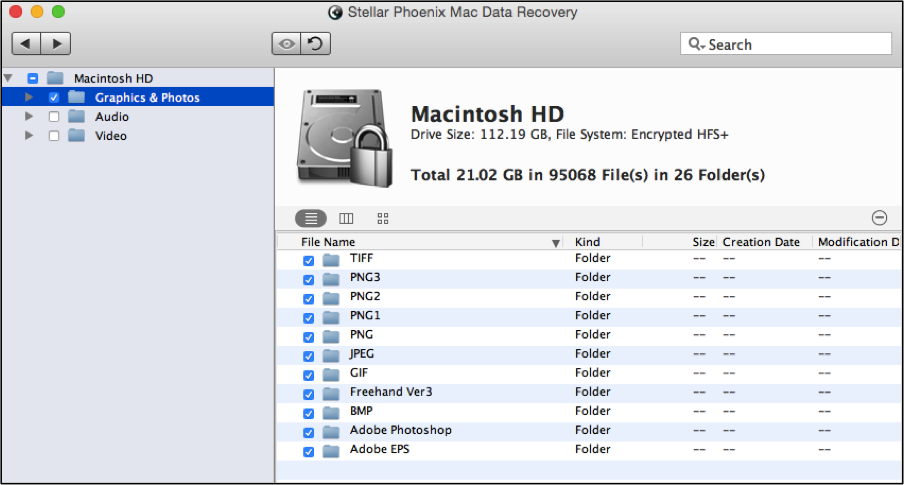
3.1 All Photos: Check the box to the left of the Graphics & Photos directory in the tree view.
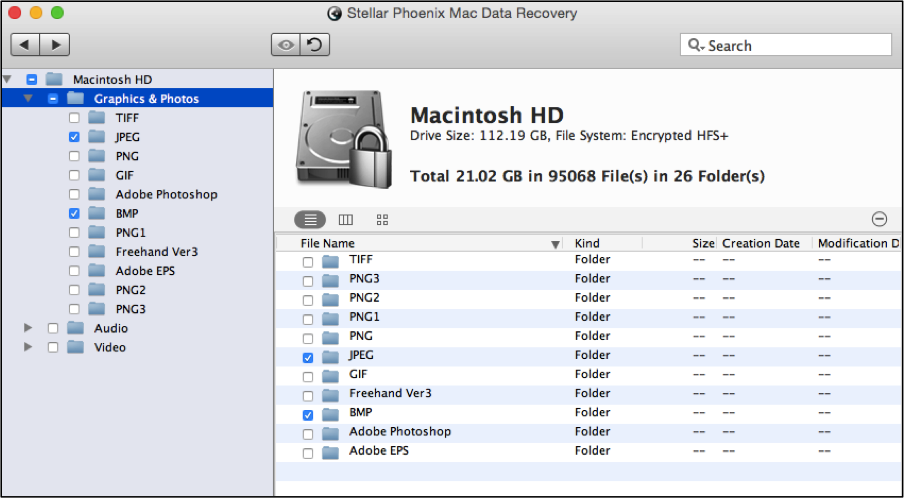
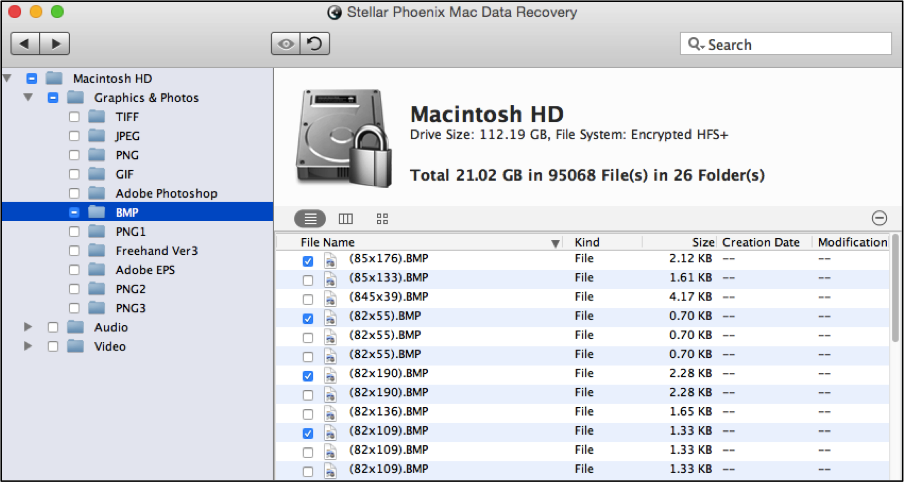
3.2 Specific Photo Format: Within the Graphics & Photos directory, you will see individual directories for each available type of photo (i.e. BMP, JPEG, PNG, etc.). Place a check in the checkbox for the photo type you want to recover. In the example below, the JPEG and BMP file types have been chosen.
3.3 Individual Photo Recovery: First navigate to the appropriate photo format directory in the tree view. Then click on that directory to see a list of files on the right hand side of the screen. Tick the checkbox for each desired file in the list and the utility will restore only those photos. In the example below, four BMP files have been selected.
Step 4: Click on the Recover button once you have finished selecting the items you want to salvage from the drive.
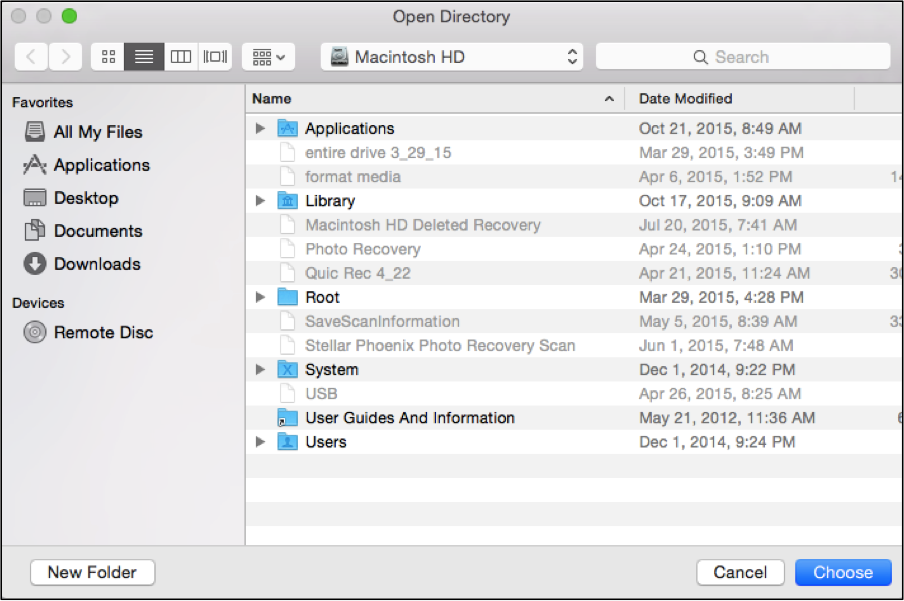
The retrieved files are then bundled in a Root folder by the utility and must be stored to a configured directory on your Mac hard drive. You will be prompted to pick a save location and can continue this process by clicking on Choose after navigating to this location.
As you can see, Mac photo retrieval software provides a simple option for salvaging important images, whether accidentally deleted or removed by other means. It only takes a few minutes to recover your photos once they have been found by the program.
Quick action ensures the best results as waiting too long could cause the photos to be irretrievable. To recover your photos, just complete these easy steps:
- Start a new scan.
- Choose the drive.
- Configure the recovery mode.
- Scan a media source.
- Pick your photos.
- Recover selected items.
Having the ability to recover your deleted photos is essential as each offers an important memory. With Stellar Phoenix Mac Photo Recovery software, you don’t have to worry of losing these items.

