iMac Data Recovery
iMac Data Recovery: All You Need is the Right Software
Deleted, lost, or corrupted file on an iMac may seem like a big problem. However, the issue is not a big deal when you use a reliable recovery program. If a recent unexpected incident has resulted in loss of information, involuntarily removed files, or hard drive reformatting, then iMac file retrieval software is the fastest, most reliable option for salvaging files.
If you are in dire need of a quick solution for retrieving files on your hard drive, then Stellar Phoenix Mac Data Recovery is your first line of defense. For example, a file is accidentally moved into trash and then the trash is emptied before you realized it had made its way there. Don’t assume the information is gone, as an iMac file recovery utility is capable of getting it back before you can even bat an eye.
iMac file retrieval software performs a scan of every sector on your hard drive. The scan locates retrievable file on the drive and you can easily restore everything or make more specific selections for retrieval. Stellar Phoenix Mac Data Retrieval provides a Quick Scan Recovery Mode to ensure you are able to retrieve certain files, specific file types, or everything from your iMac. Simply install this utility and follow the steps below to complete a successful iMac file retrieval.
How to Restore Files on an iMac
Mac computers contain a primary volume titled “Macintosh HD” that is used to store files. When a file is removed, its address is deleted from the table used by the operating system to locate data. It is the same whether only a few files are removed or the entire drive is reformatted; however, the files remains on the computer and has a retrieval window. New data overwrites specific sectors on the drive but you can regain information as long as the overwrite has not taken place yet.
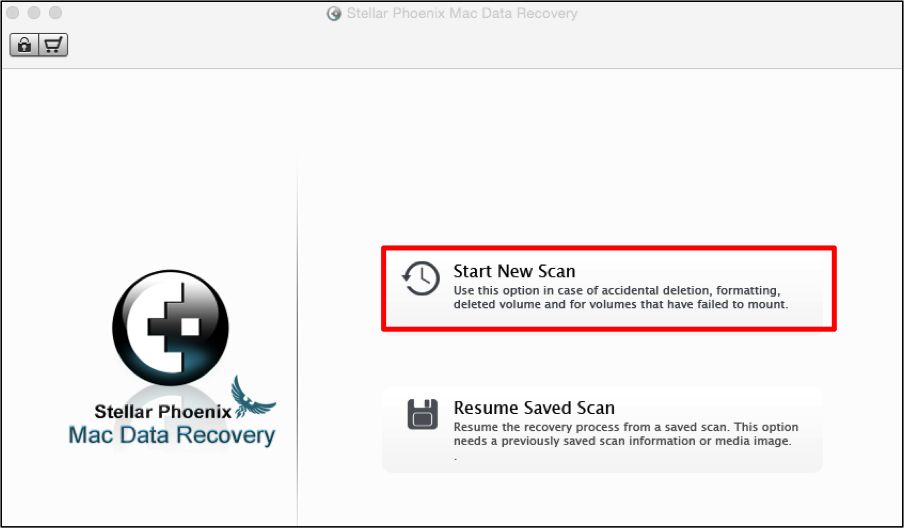
A quick iMac file retrieval is your best option to regaining files or the entire drive. To start the retrieval, first open the utility and choose the Start New Scan option.
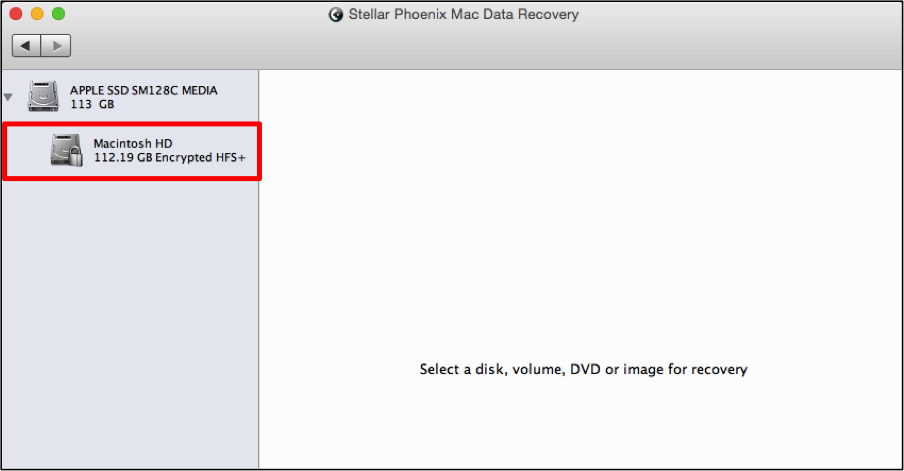
Step 1: Choose a Volume to Scan. This will inform the utility on where to search for the file and data. For this example, the Macintosh HD volume will be scanned.
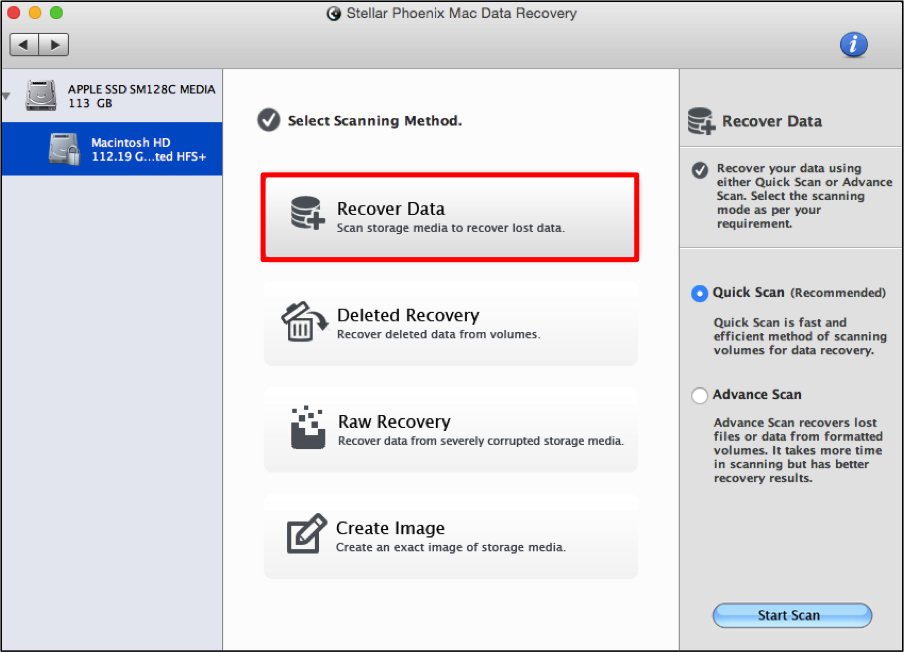
Step 2: Select a Recovery Mode. To show how to quickly retrieve files, we will be choosing Recover Data and leaving the Quick Scan option selected.
This option will quickly scan the chosen hard drive and locate anything that has been removed or lost. In most instances, this option will successfully locate any required item for retrieval; however, a deep scan option is also provided for situations where files cannot be traced.
Each change made on the computer or drive will affect what iMac file recovery finds. To obtain the best results, immediately stop making changes on the computer.
Click on the Start Scan at the bottom of the screen to begin scanning for files on the selected drive or volume.
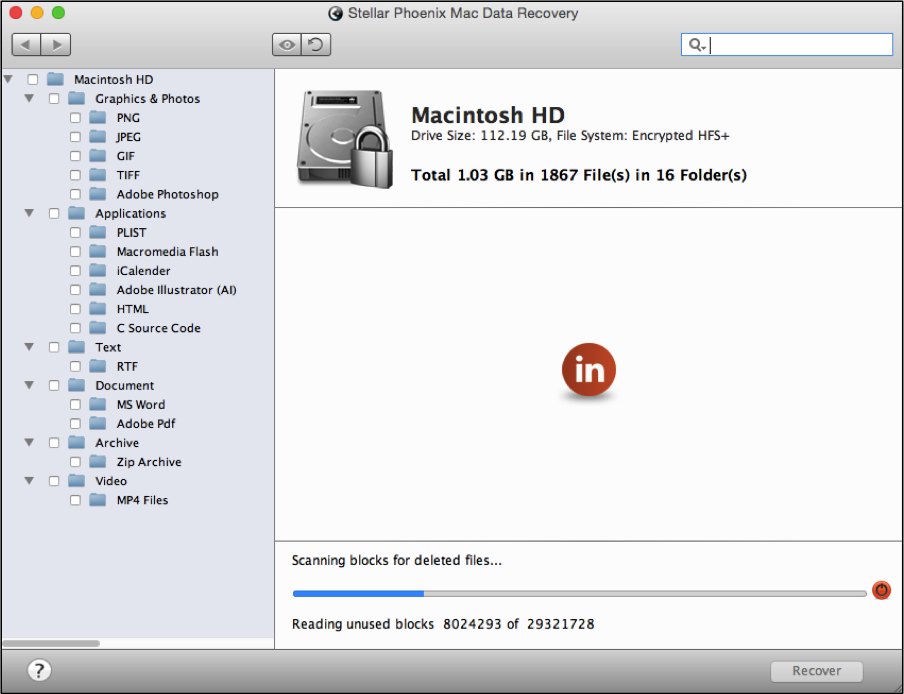
A quick scan does not take an extensive amount of time and you can monitor its progress while it takes place. If something comes up, the scan may be aborted by clicking on the red button located on the right side of the progress bar.
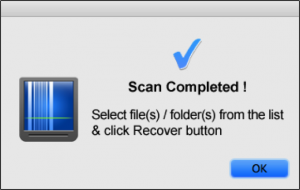
When the confirmation message shown below appears on your screen, the scan has completed. You must click on OK to return to the utility and view the scan results.
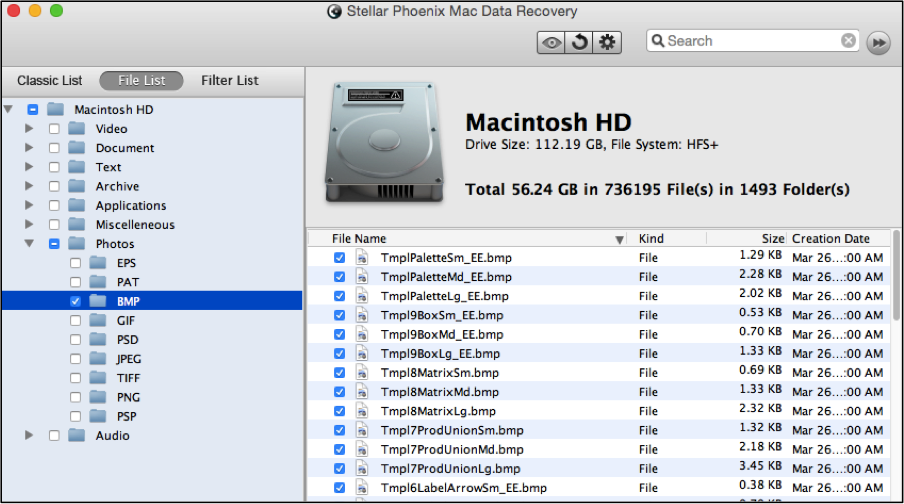
Step 3: Select Files in the Scan Results. Because scan results are originally displayed by location, the first step will be to click on File List above the tree view.
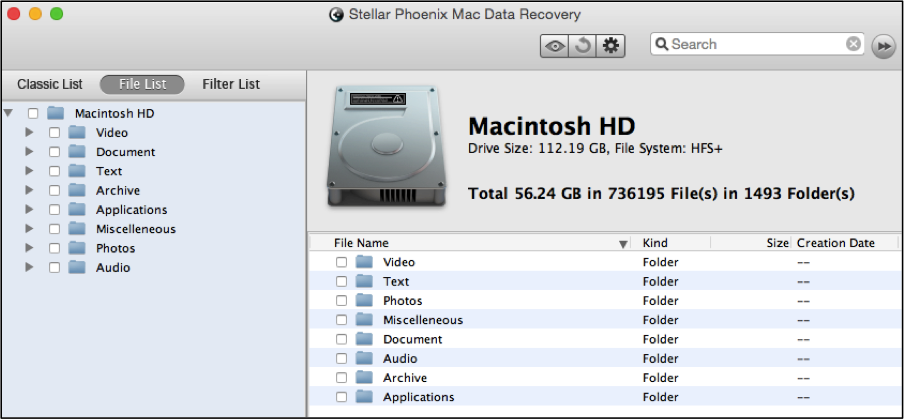
Next, you will need to choose what files will be recovered from the drive. If you want to regain all data, tick the checkbox to the left of the drive name in the tree view.
Certain files may be marked for retrieval by placing a checkmark next to each type in the left panel. For example, if Video and Photos are checked, then all files of these types will be recovered.
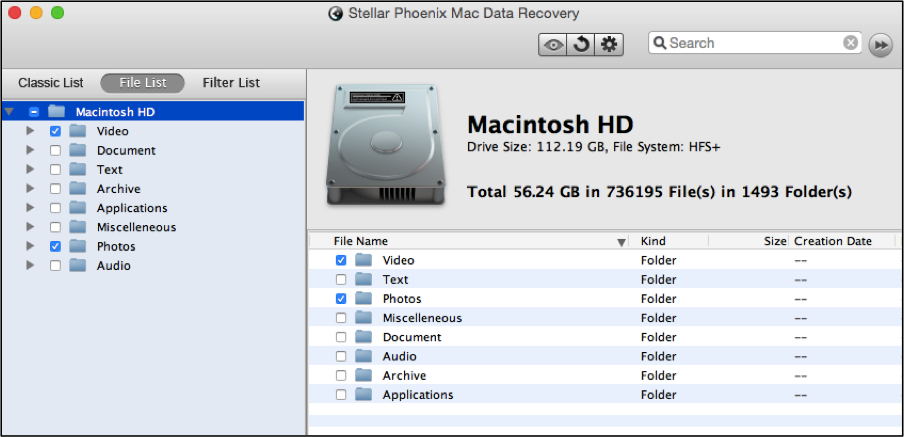
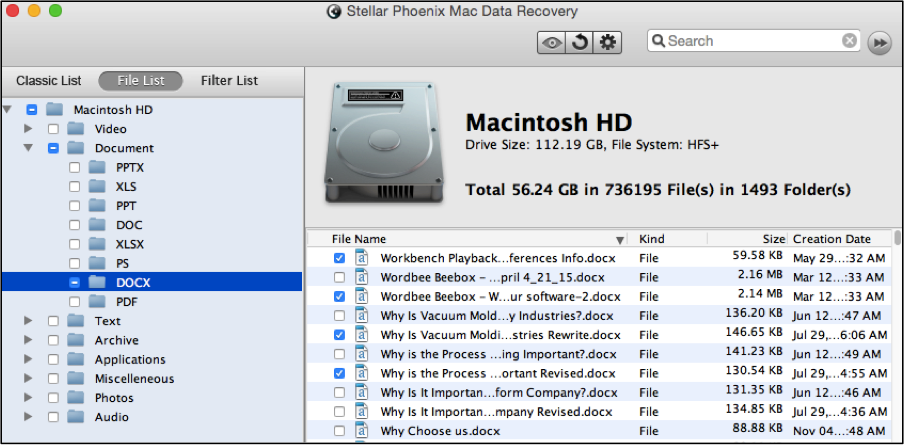
The Mac Data Retrieval utility also makes it easy to select specific files for restoration. For example, if you expand Photos and then check BMP, then all BMP files will be recovered. To select certain file types, just expand a folder such as Documents or Videos and check the box next to each type you want to retrieve.
By clicking on a certain type of file, you can check individual items on the right portion of the utility window. For example, four DOCX files have been selected in the utility.
Step 4: Complete iMac Data Recovery. One more step is required to complete your iMac file retrieval. You will need to click on Recover to initiate the restore and then choose where the recovered files will be saved.

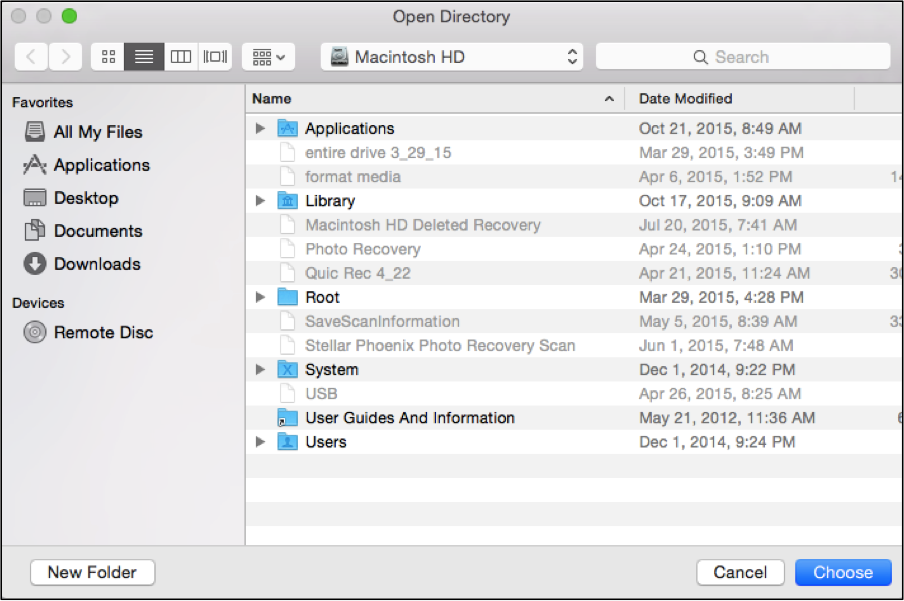
Every selected recovery item will be saved to a chosen directory in a Root folder. First, browse to the desired location, then make a selection and lastly, click on Choose. Mac Data Retrieval will finish the process after doing so, placing your files in the desired location.
Regardless of how much data or what files you need to retrieve, any combination may be quickly salvaged from a hard drive. The following steps are all you need:
- Choose a volume to scan.
- Select a recovery mode.
- Select files in the scan results.
- Complete iMac data retrieval.

