How To Undelete Files on Mac
Unintentionally deleted files on your Mac might seem like a horrifying event, but these items may be retrieved if action is taken immediately. You see, the operating system just removes the location of the data from its address table when an item is deleted on a Macintosh. They are not actually deleted until the hard drive sector where they reside is overwritten. The risk of files being irretrievable is less the faster you act because these items are simply waiting to be overwritten with new data.
Retrieval is completely possible if you stop making changes immediately and take the appropriate steps to retrieve the information. Stellar Phoenix Mac Data Recovery locates currently deleted files on a Macintosh hard drive by scanning the volume where the data resides. You can then use the utility to undelete files on your device. If a scan is completed instantly, deleted items may be retrieved easily without the worry of overwrites.
Stellar Phoenix Macintosh Data Recovery is an easy option for restoring deleted files on your Mac Air, iMac, Mac Mini, MacBook Pro, or Mac Pro. The utility must be installed before this process can be completed. After the utility has been installed, you will be given the option to select a volume or external drive and the appropriate retrieval option.
4 Steps for Quick Retrieval
For this tutorial, we will be showing how to perform a full scan for every deleted item. You will need to scan the main Macintosh HD volume on the drive. The following steps are necessary so you will know how to undelete files on Macintosh:
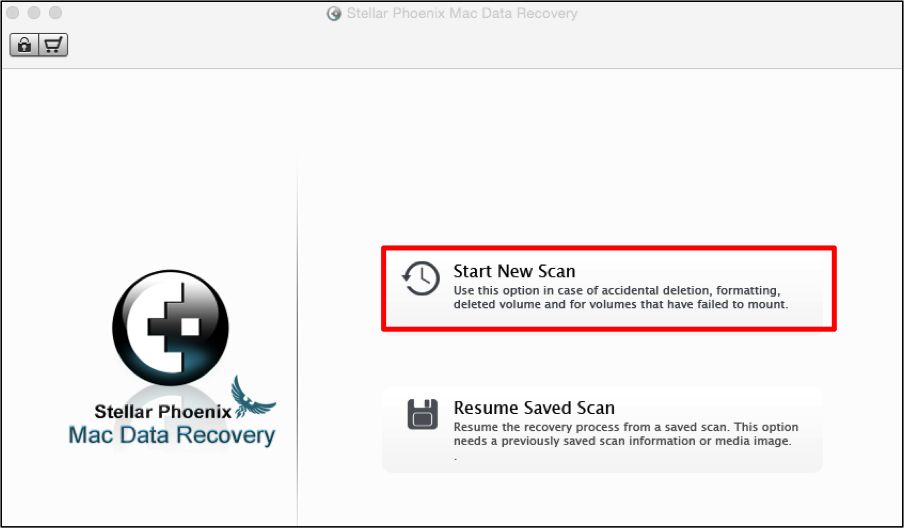
Step 1: In order to retrieve deleted items, you must first scan your hard drive to find the data. Click on Start New Scan to begin selecting the volume or external drive you would like to scan.
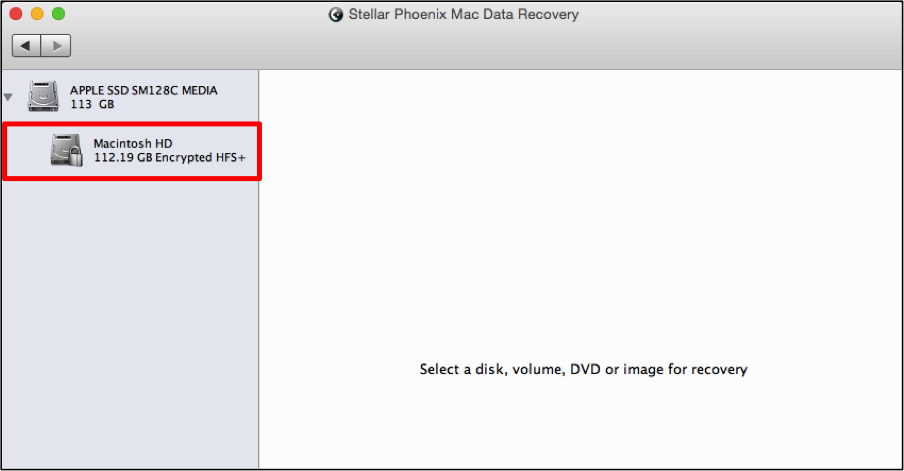
After which, click on the name of the volume on the left side of the screen that you want the Mac Data Retrieval utility to scan for deleted data. Macintosh HD is chosen for this example.
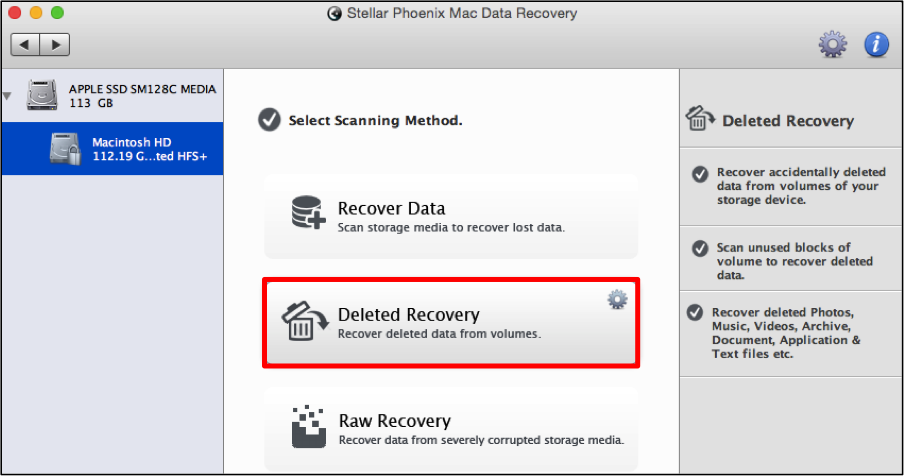
Step 2: Next, you will need to choose Deleted Recovery option to perform a deep scan for all deleted files on your device.
Important: If you have waited for an extended period of time to perform these steps, then certain file may no longer be retrievable. This is because it might have already been overwritten on the hard drive.
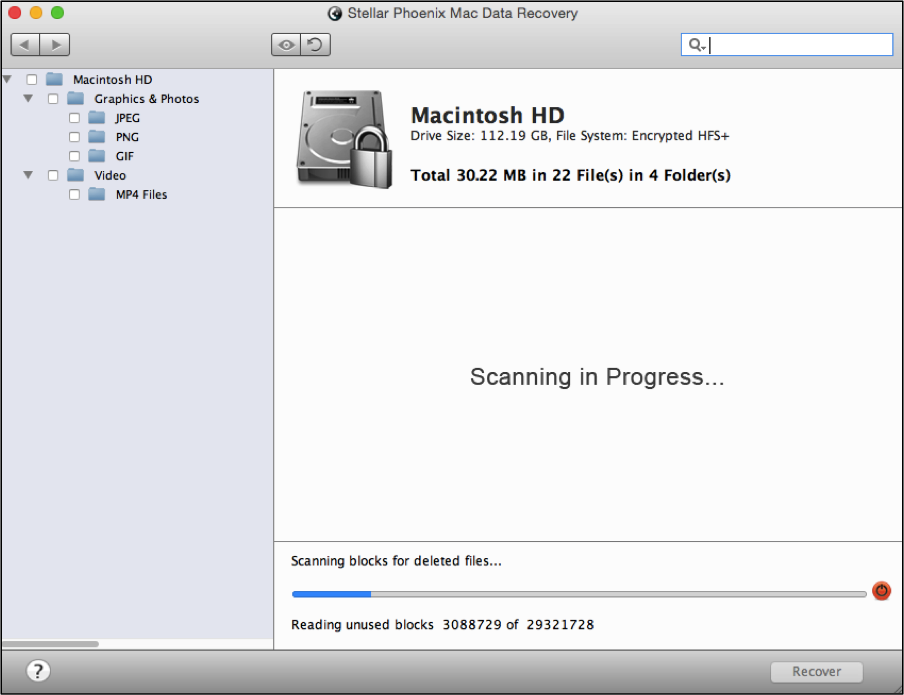
Click on Start Scan to begin scanning for recoverable files from your Mac hard drive. Since Deleted Recovery involves a deep search of the volume, the scan may take a little while to finish.
Wait patiently for the scan to complete, as this will take some time for a deleted retrieval. Click on the ‘stop scan” button (red circle) at any time to stop or abort a scan.
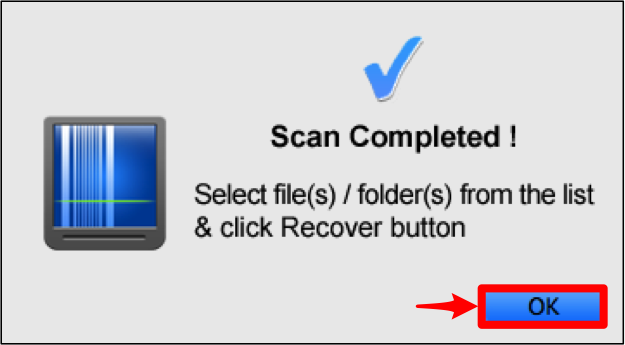
You will be provided with a confirmation message once the scan has completed successfully. Click on OK to return to the utility and view the retrieved information.
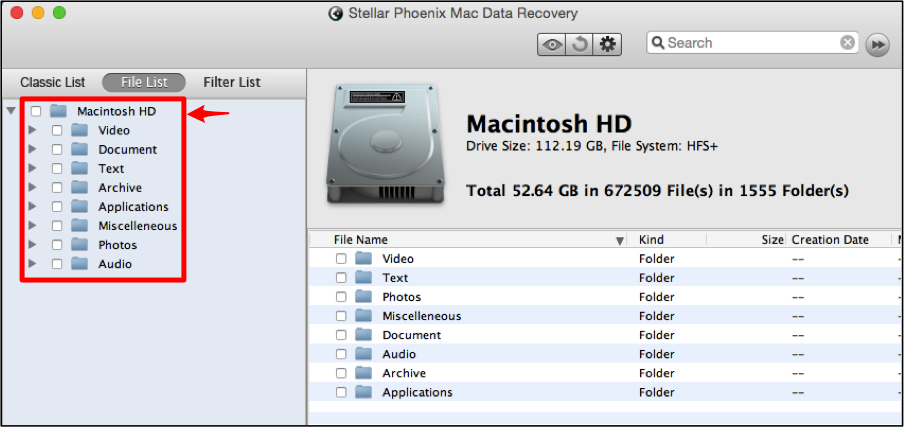
Step 3: Several options are provided including the ability to retrieve the entire volume, just specific types of files, a designated format, or single files. To select the entire volume, simply click on the checkbox next to the volume name.
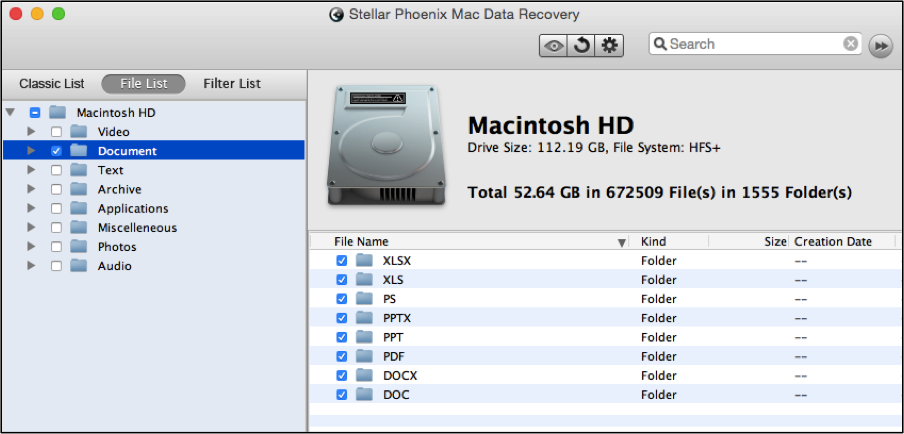
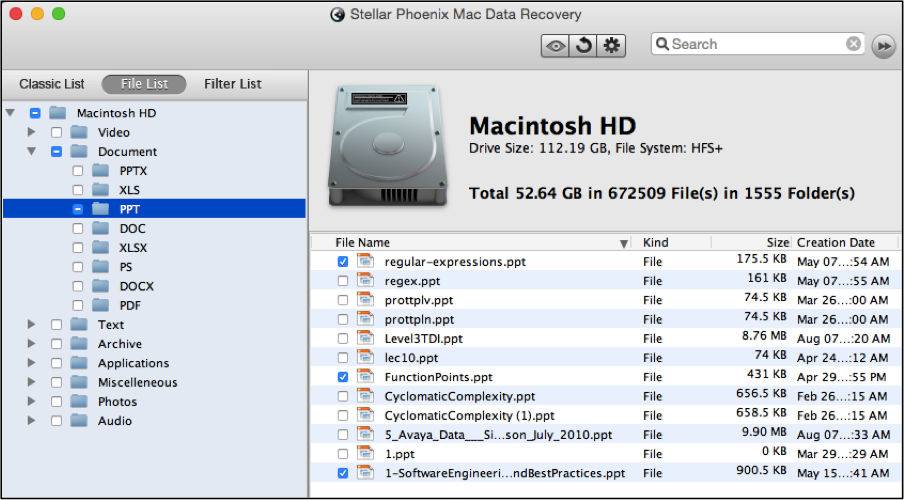
If a specific file type is needed such as Documents, set the view to File List and then click on the checkbox next to the desired type.
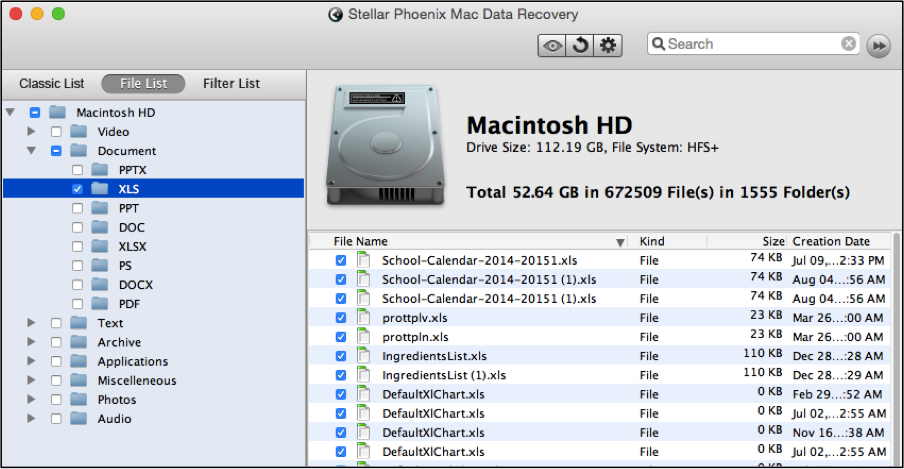
In some instances you might need to retrieve a specific file format. To do so, expand the tree view and select a type such as Documents or Photos. Tick the box next to the desired format in the tree view. XLS in the Documents folder is chosen for this example.
To choose individual files, expand the tree view for the desired type or format and then click the checkbox for each desired file on the right hand side of the screen. The Power Point (PPT) folder has been chosen and three individual files are selected for retrieval in the following example.
Click on the Recover button after all desired files have been selected for retrieval.
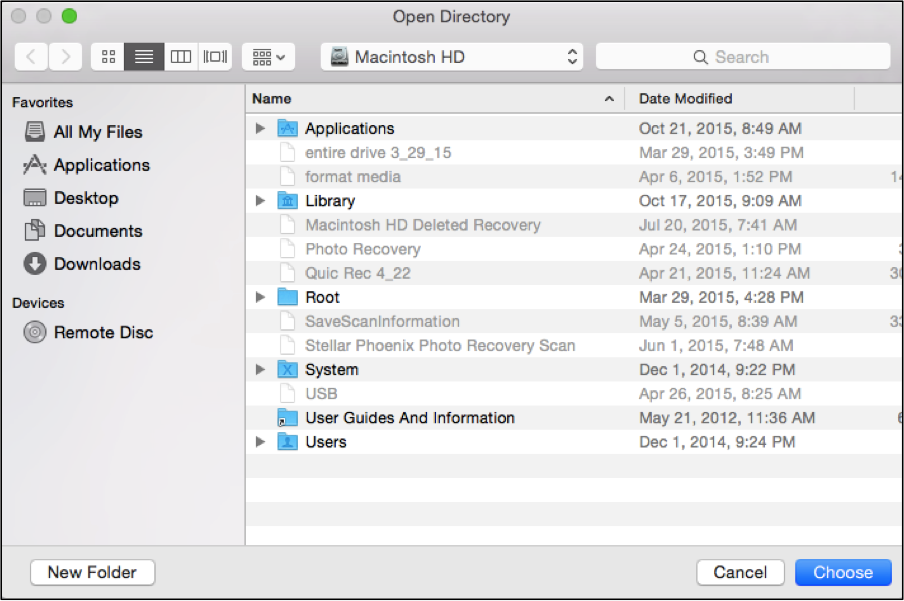
Step 4: A directory for storing these items must be selected on your Mac prior to starting the retrieval process. The files you have selected for recovery are saved in the chosen location by the Macintosh Data Retrieval utility.
As you can see by this tutorial, to undelete files on Mac is an easy process. Swift action ensures that the files are available for quick retrieval by following these basic steps with the Mac Data Retrieval utility:
- Choose a volume or drive.
- Select the recovery type and scan.
- Pick the desired deleted files.
- Finish the recovery process.
An accidental file deletion is not the end of the world with the right recovery program. You can install Stellar Phoenix Mac Data Retrieval and quickly retrieve any deleted file.

