Recover Lost RAW Images on Mac
How to Recover Lost RAW Images on a Mac
Photographers, hobbyist, and even businesses use RAW images to capture an image on a camera that has not been digitally modified when taken. The format is clearer and considered to be the best way to initially capture an image. RAW is a file format just like JPEG, TIFF, or BMP. The difference between these formats is how the information is compressed and coded.
JPEG is the most common file format used when taking pictures or scanning images. Since the camera compresses the image, it is believed that the JPEG format compromises the compressed pixels. For this reason, many prefer to use RAW images because the photo is not processed in the camera. However, these files can sometimes become lost or deleted and need to be recovered.
If you use this image type and something goes wrong with the camera, external drive, thumb drive, or other storage media where it is stored, then you need a way to get this information back. Stellar Phoenix Macintosh data recovery is a tool you can use to search for and recover lost RAW images on Mac. With this utility, it is possible to scan the local hard drive on a Mac computer or external storage media for photos that have been lost or deleted and regain them in a matter of seconds.
Mac Data Recovery can be used to perform a quick scan for recoverable data. The utility offers several features for locating and recovering exactly what you want including the ability to:
- Search for more than 300 file types.
- Preview each scan result.
- Customize the recovery selections.
- Search for specific files in the scan results.
- Scan for customized file types.
To get started, you will first need to download Stellar Phoenix Mac Data Recovery to a Mac computer and complete the install. The next step will be to connect the camera or an external storage media to the computer for finding the RAW images. If they are stored on your computer’s hard drive, this preliminary step is not necessary. Next, open the utility and follow the steps shown in this tutorial.
5 Easy Steps to Recover Lost RAW Images on Mac
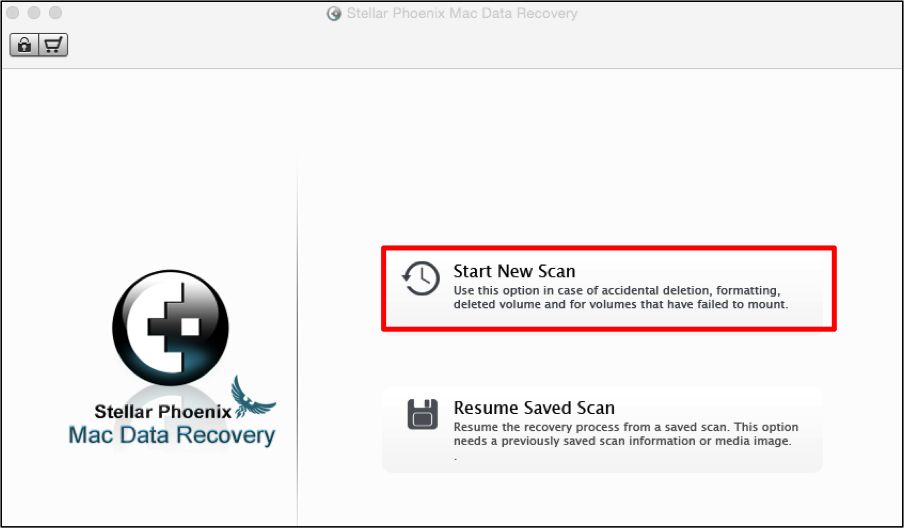
Before getting started, make certain the utility has been installed on your Mac computer, the external storage media or camera has been connected, and Mac Data Recovery is running. Then click on Start New Scan to begin setting up the recovery.
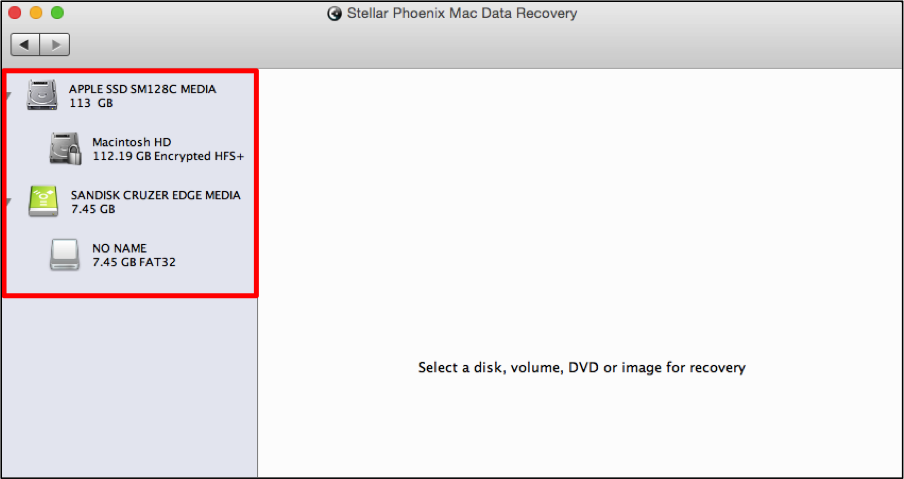
Step 1: Select Your Storage Source. RAW images can be stored in a number of locations including a local hard drive, USB drive, or directly on your camera. Each internal drive and connected external storage media will be displayed on the left side of the screen.
In the example below, an SD card is shown and a camera is connected. Click on the storage source you want to scan for recoverable data.
Note: For the rest of this tutorial, we will be using the local hard drive of a computer, but the steps remain the same regardless of what storage media you are scanning.
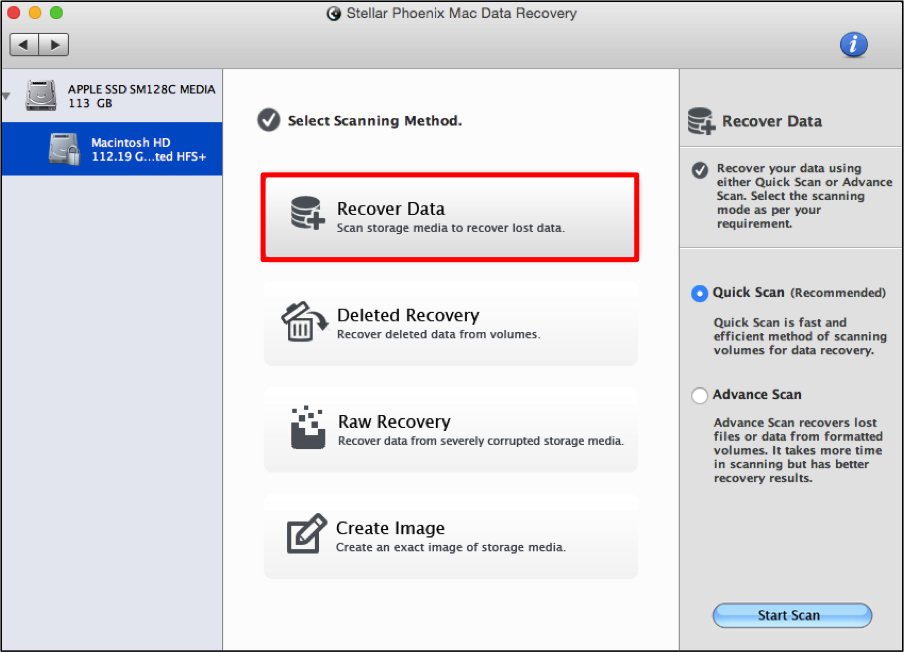
Step 2: Choose Your Scanning Options. After a storage source has been chosen, you will need to configure what scanning method will be used. For this example, click on Recover Data and then make certain the radial for Quick Scan is chosen.
Step 3: Scan for Salvageable Files. The scan will not be started until you click on Start Scan located at the bottom of the available options.
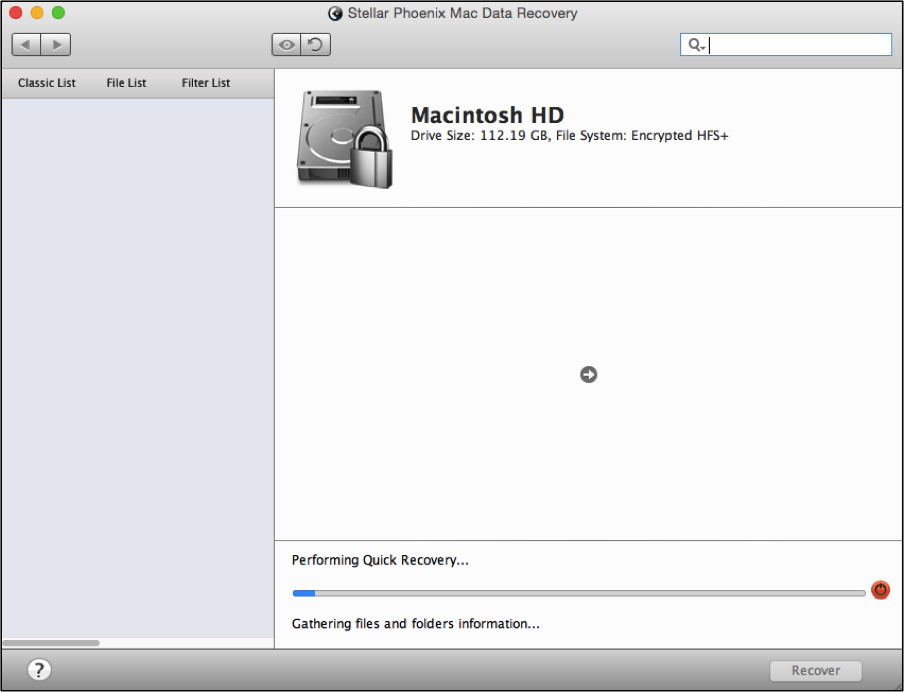
The scan could take some time if the drive or storage media is large; otherwise, the process typically only takes a few minutes. You will see a tree view begin to populate with folders and a progress bar is provided to monitor the progress of the scan.
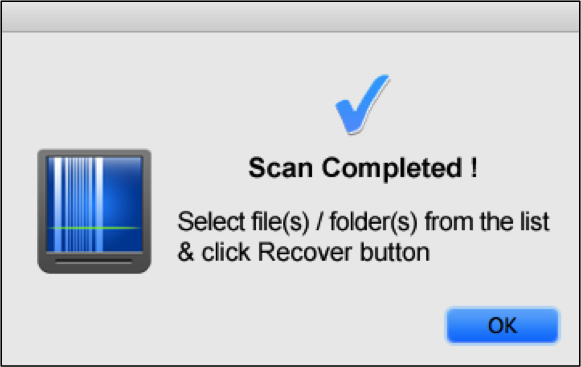
A pop-up window will appear to show that the scan has finished. Click on OK and you will be redirected to the scan results.
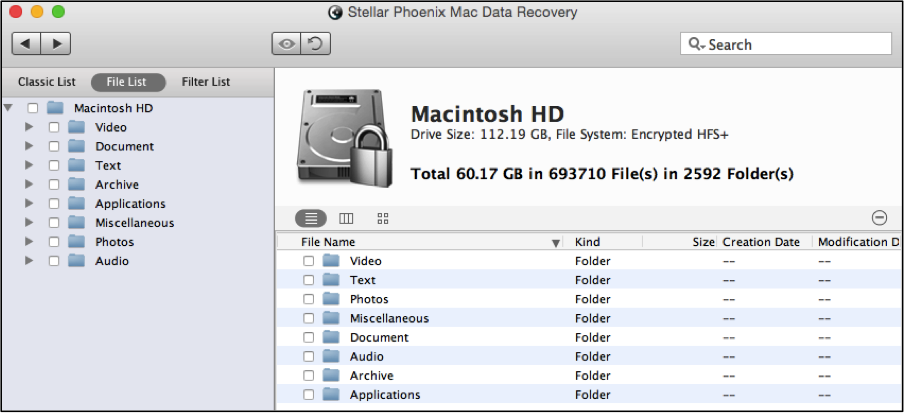
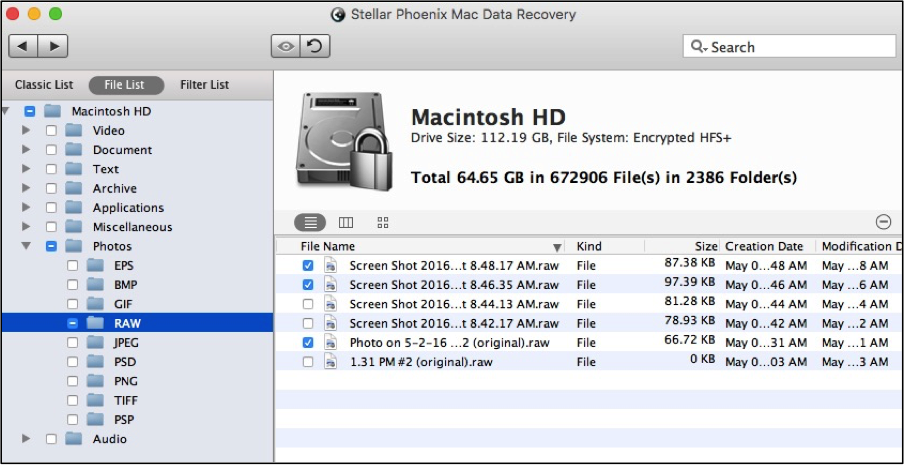
Step 4: Recover Every File or Make Selections. To begin, first click on File List at the top of the tree view. This will organize the results by type rather than by where they are stored on the scanned storage.
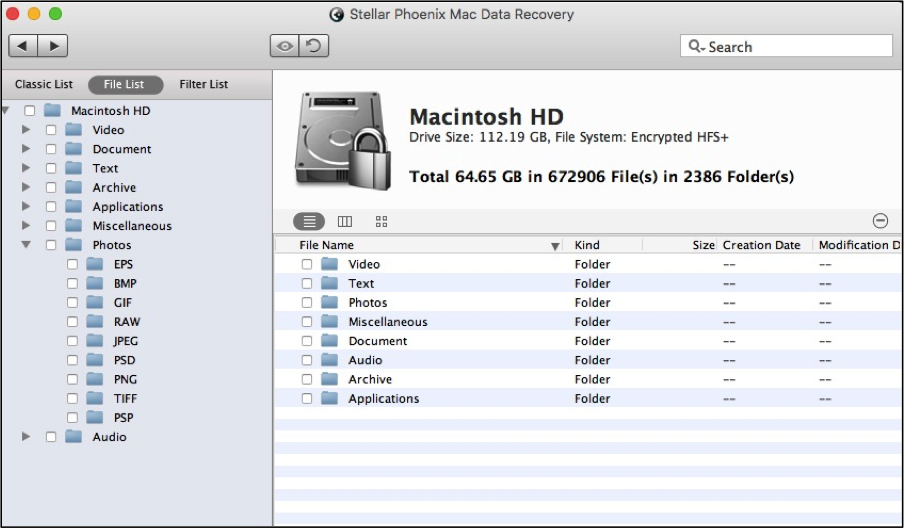
After which, expand the Photos folder by clicking on the arrow to the right of its name in the tree view. This will show additional folders for each format found during the scan.
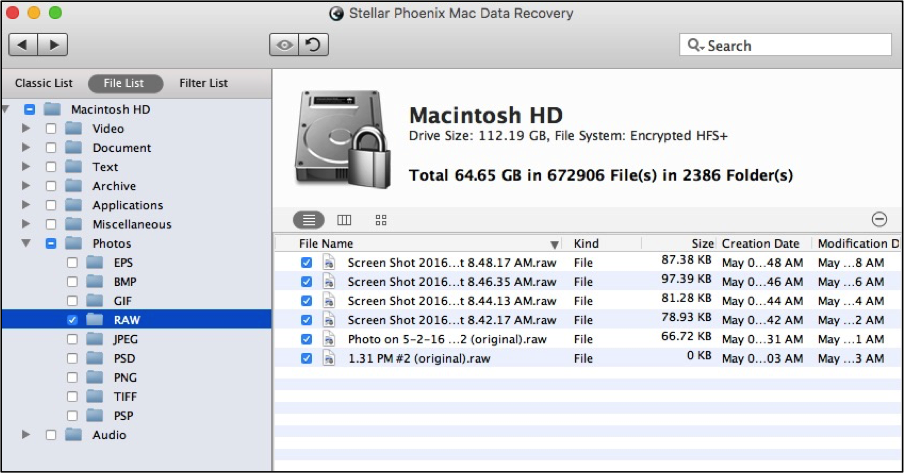
To recover all RAW images found by the scan, tick the checkbox next to the RAW format folder.
Otherwise, you can click on the RAW folder to view each RAW image found by the scan on the right side of the window. Then tick the checkbox for each image you want to recover.
Step 5: Retrieve the Chosen Files. You must click on the blue Recover button in the bottom right corner to finish retrieving the files. Afterwards, you will need to browse to a location for saving the data and Macintosh Data Recovery will store the information there.
RAW images offer several advantages whether you are a professional or are using the format for a hobby. Stellar Phoenix Mac Data Recovery provides a simple solution any time these files go missing or are removed from your hard drive, camera, or other types of external storage media. To recover lost RAW images on Mac, you will need to perform the steps listed below:
1. Select your storage source.
2. Choose your scanning options.
3. Scan for salvageable files.
4. Recover every file or make selections.
5. Retrieve the chosen files.

