Description

Time is of the essence as each change on a computer increase the risk of losing critical data. Windows Data Recovery is an advanced tool for finding any deleted items that have not been overwritten on a drive or compatible device. The utility supplies an easy to use solution for regaining lost or deleted files quickly.
Windows Data Recovery provides several customization choices for regaining files on your PC. It is a simple option for retrieving files or entire drive volumes in these unexpected scenarios:
- Accidentally Removed Files
- Data Loss or Corruption
- Loss Due to Hard Drive Reformatting
- Issues Resulting from Operation System Installations
- Unfortunate Results from Virus Activity
Stellar Phoenix Window Data Recovery is a professional solution designed for cheating the consequences of data loss caused by an accidental deletion or another unexpected issue. This tool will be able to scan a selected volume or device on your PC and begin locating recoverable items in minutes. It is a dependable choice for locating specified file types or every item on your PC and makes the process of restoring information a dependable, stress-free task.


![]()
Windows Data Recovery Features
The Windows Data Recovery utility provides several beneficial features to help on your journey to dependable data retrieval. Among these features is the ability to quickly locate any type of file or entire volume on your drive or device for restoration. Windows Data Recovery offers various features for retrieval including the ability to:
- Salvage entire volumes from a Windows hard drive.
- Retrieve individual files from a PC or a connected device.
- Create images for later recoveries.
- Quickly find specified files through the Search Toolbar.
- Display only selected files in the scan result tree list.
- Perform advanced scans.
- Sort scan results in various ways.
Stellar Phoenix Windows Data Recovery provides a user-friendly interface that offers a variety of customization options. These options ensure you are able to find the right information the first time for dependable file retrieval.

Mobile Phone Recovery – Another beneficial feature is the ability to retrieve items stored on the internal storage of a smartphone or a phones memory card. Pictures and video collections can be safely stored on the PC used for this process in minutes.
Lost/Deleted Volume Recovery – Perform a scan for lost or deleted volumes on your hard drive to locate remaining files for retrieval.
Save Scan Results – Scan results may be saved and accessed later to complete the recovery.
File Format Customization Options – Specific file types and formats may be configured within the application preferences to make choosing only the desired items easy for faster results.
Preview Items Found for Recovery – Preview items as they are located and after the scan. Then check the box next to each desired item or folder in the tree view.
Find Recoverable Files Quickly – After the scan has completed, you can use the Search Toolbar to locate the desired items and avoid the extra time of going through every result to find this data.
How to Get Started with Stellar Phoenix Windows Data Recovery

Stellar Phoenix Windows Data Recovery delivers a reliable solution for restoring your data in a number of file loss situations. Any information that has been deleted or lost on your drive or device remains present until the physical storage sector has been written over by new data. Windows Data Recovery can perform a scan to retrieve items that still reside on a physical hard drive, USB drive, memory card, or other Windows compatible digital device for fast restoration.
This tool offers a dependable way to salvage important files and media at times when malicious activity or user error results in data loss. To get started, simply download a free trial and install it on your PC. Then perform the steps listed below to see what items are salvageable:
- Install Windows Data Recovery.
- Select a Formatted Volume or External Device.
- Initiate Scanning of the Selected Location.
- Preview Results and Make Selections.
- Save the Data to Your PC.
Stellar Phoenix Windows Data Recovery offers several advanced options to help you retrieve exactly what is needed from a PC or external storage device. A few minutes is all that is necessary to complete the above steps and the data will be safely saved to a location of choice.
Installing Windows Data Recovery
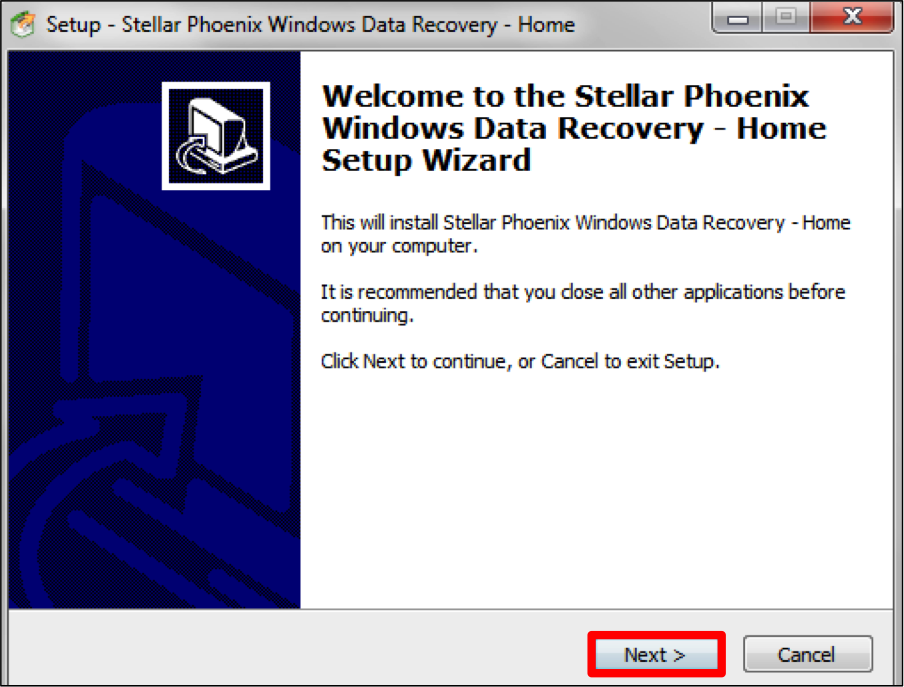
Install the utility on your Windows computer to begin the recovery process. Open the download file and then click on Next to begin the installation process.
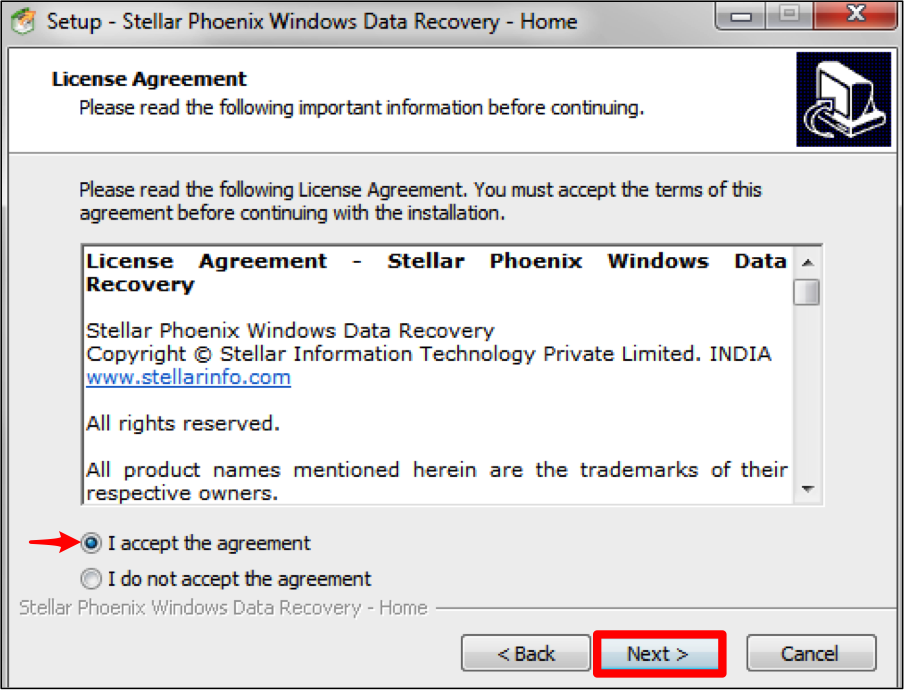
The licensing agreement must be accepted before you will be able to advance to the next installation step. Click on the option titled “I accept the agreement” and then click on Next to continue.
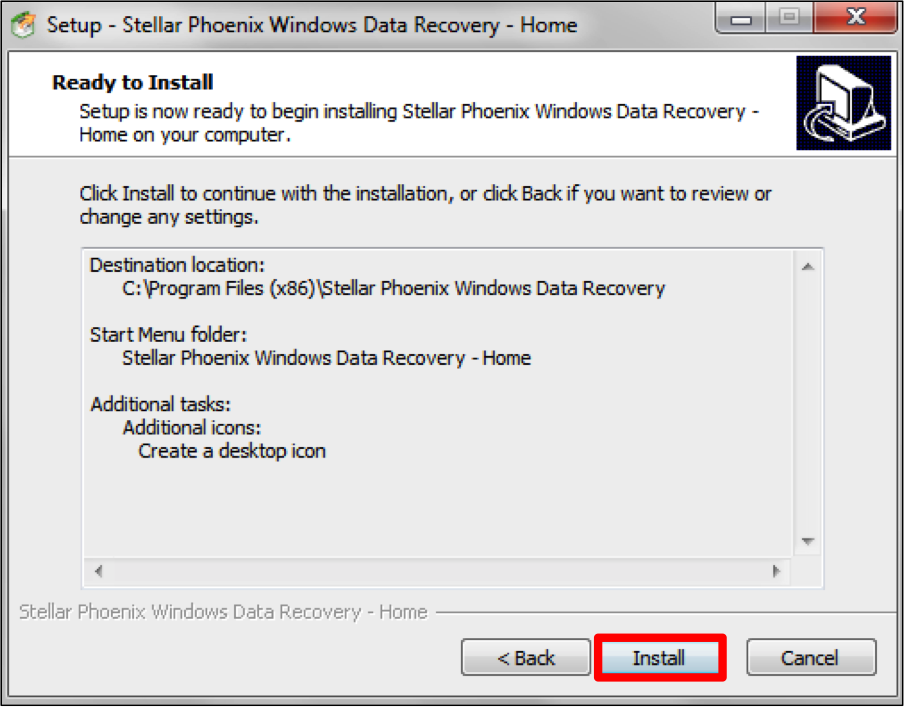
The next few steps for the install cover the default configurations for the save location, desktop shortcuts, and quick launch icons. Click on Next for each screen to continue advancing to the install prompt.
Once you have moved past these screens, click on Install at the bottom of the screen shown below to start the install.
Recovering Files or An Entire Volume
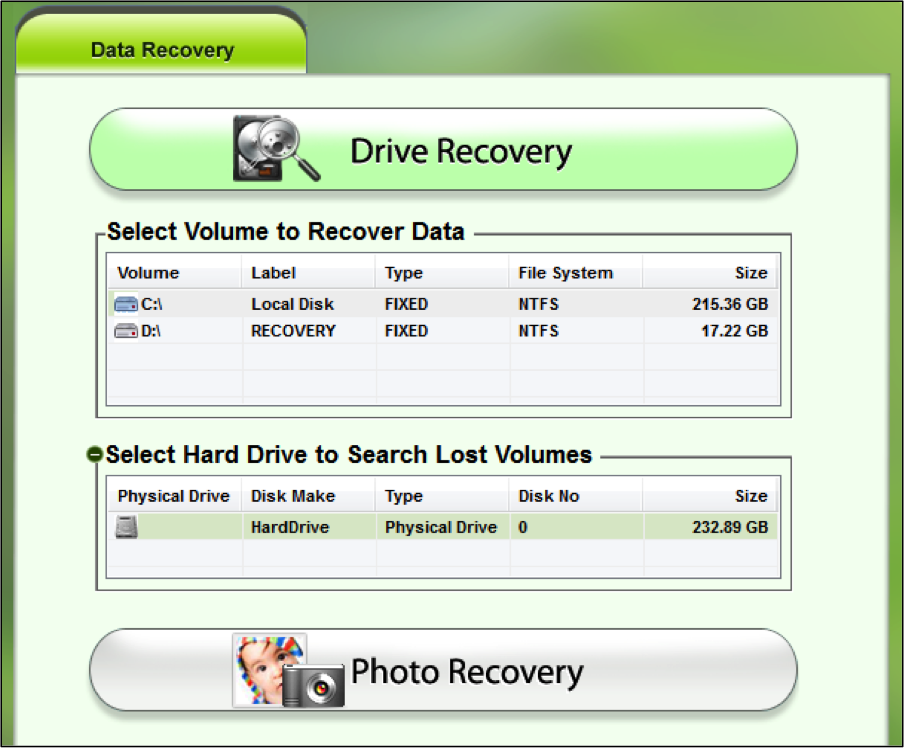
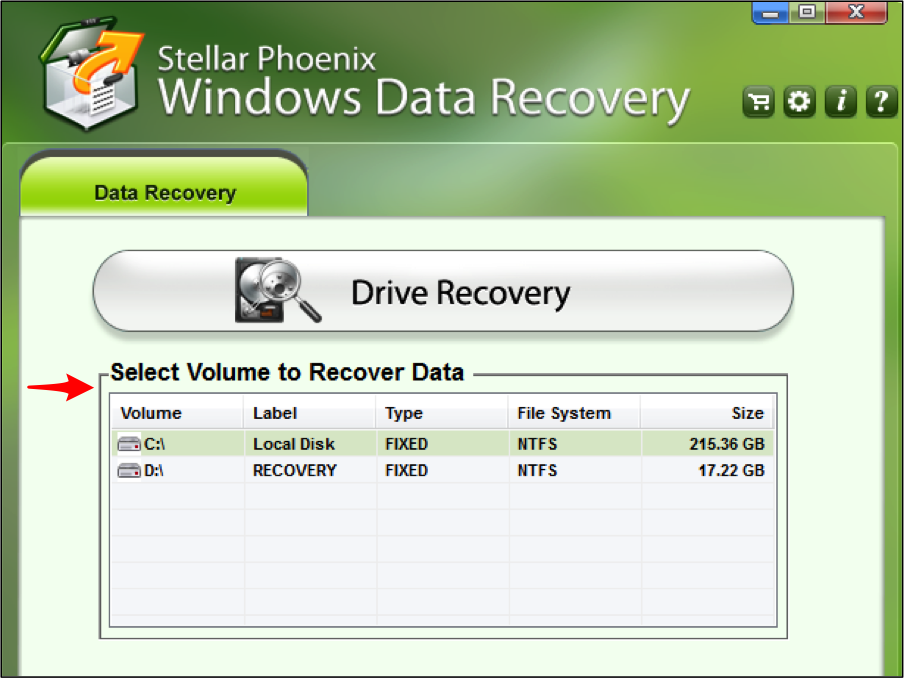
After installation, open Windows Data Recovery and select the volume or device you want to use for data retrieval. The scanning source may be a hard drive volume on your PC or any connected external storage device (USB, memory card, flash card, etc.).
You may access the preferences for Windows Data Recovery by clicking on the Settings Icon in the top right of the screen.
Here you will be able to make changes to general application options or add file types for retrieval during scanning. These options are accessible from the main application window.
After making any desired preference changes, you will be able to:
- Choose a volume for basic or advanced recovery.
- Choose a hard drive to scan for lost volumes.
- Perform a photo recovery with the utility.
For this example, we will be scanning a volume on the PC hard drive. Click on the volume name in the main utility screen underneath Drive Recovery to make a selection.
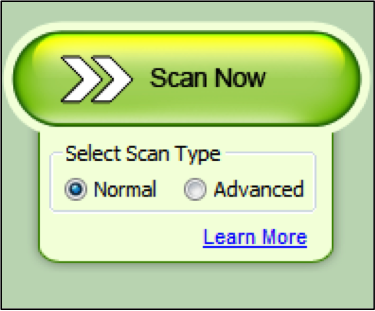
Then click on Scan Now on the right side of the screen to initiate a full volume scan.
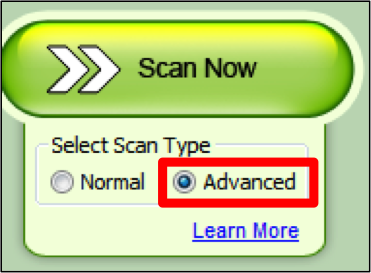
Note: You may also select Advanced to perform a more advanced scan of the selected volume or device.
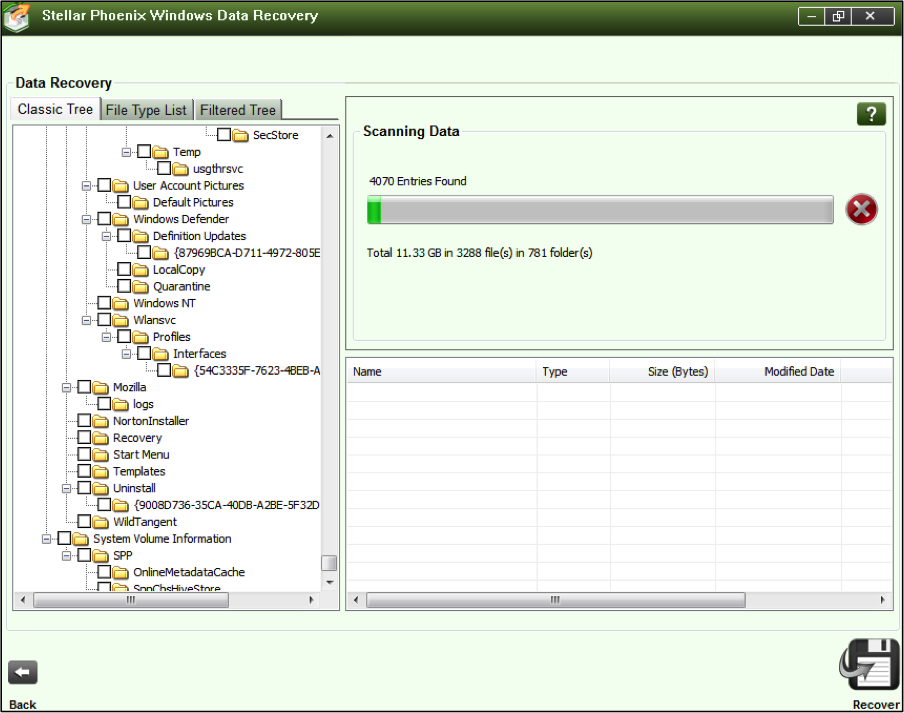
As scanning occurs, you will see a tree view begin to populate on the left side of the screen. Windows Data Recovery will populate the view with each retrievable file located on the chosen drive volume or device.
A progress bar is provided in the upper right of the screen to show the current status of the scan.
After this step is completed, you will be able to preview and select files found during the recovery scan including:
- Individual Files
- File Formats
- File Types
- Entire Volume
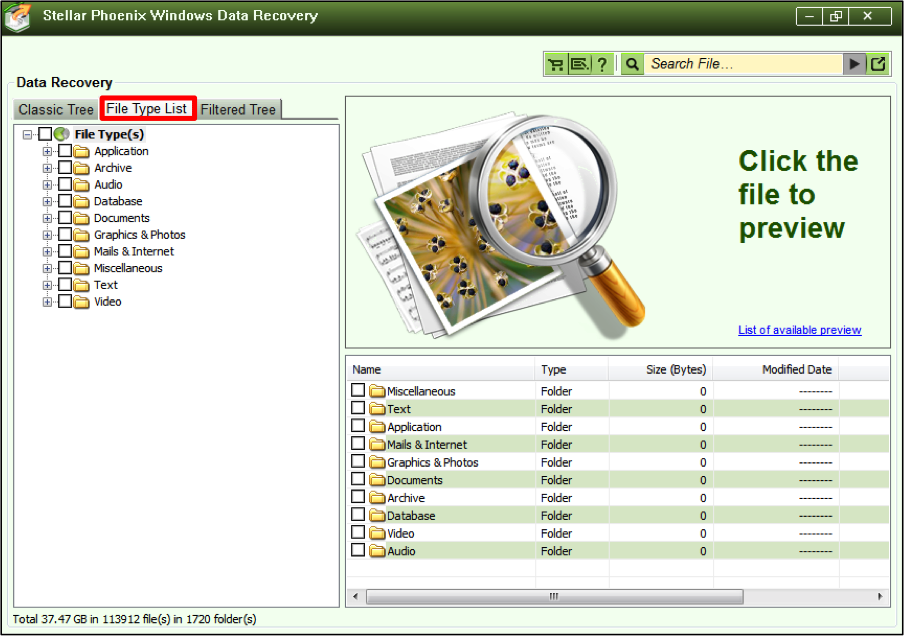
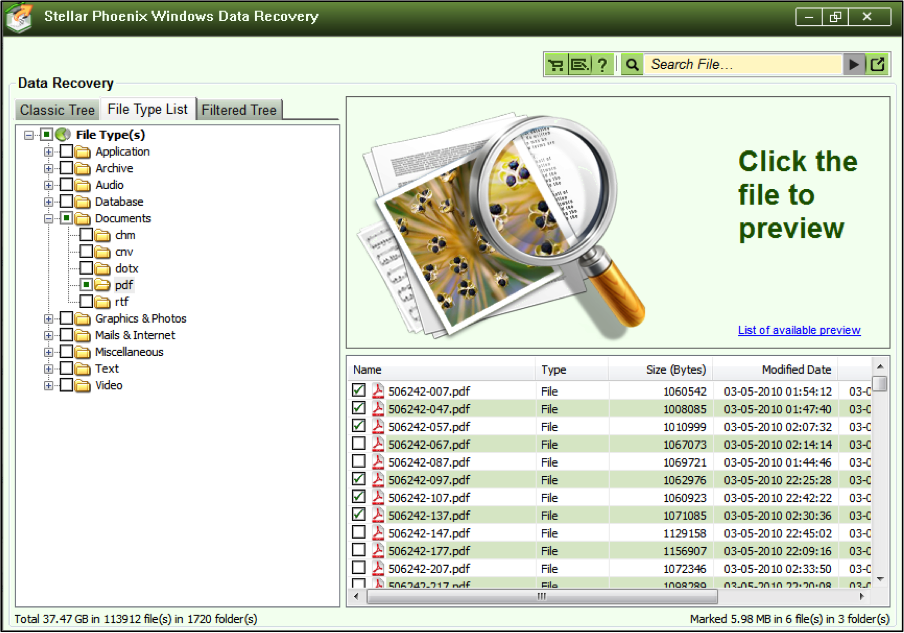
To make things easier, click on File Type List and the located items will be grouped by type and format. By expanding the tree view, you will be able to see each type and corresponding format.
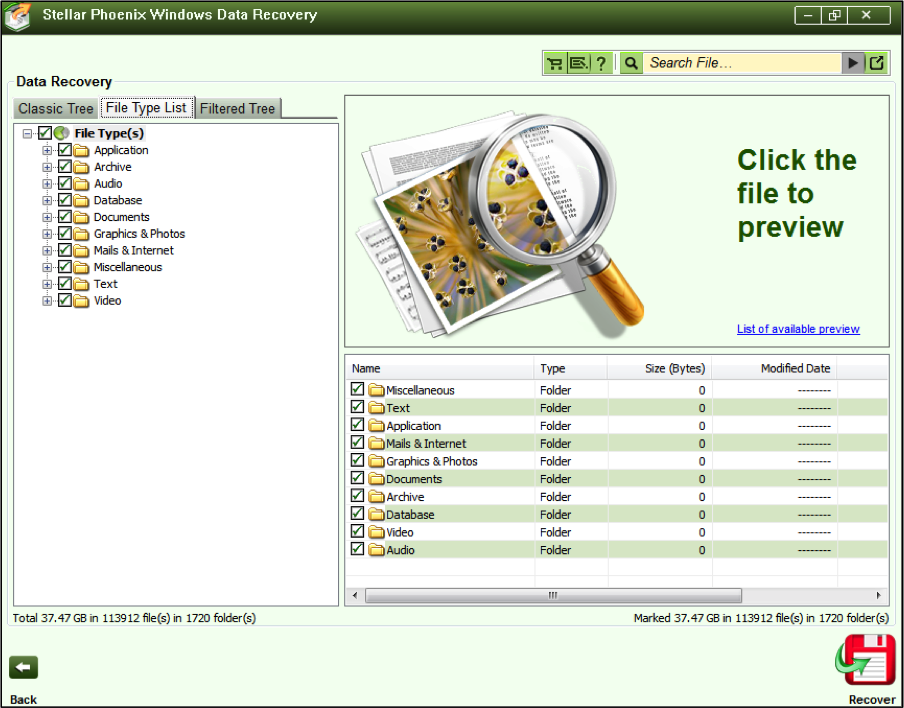
The next step involves making selections for recovery, which may be done by clicking on the checkbox next to each item that should be restored from the volume or chosen external device.
Click on the checkbox next to File Type(s) if you want to retrieve every item for a full volume restoration.
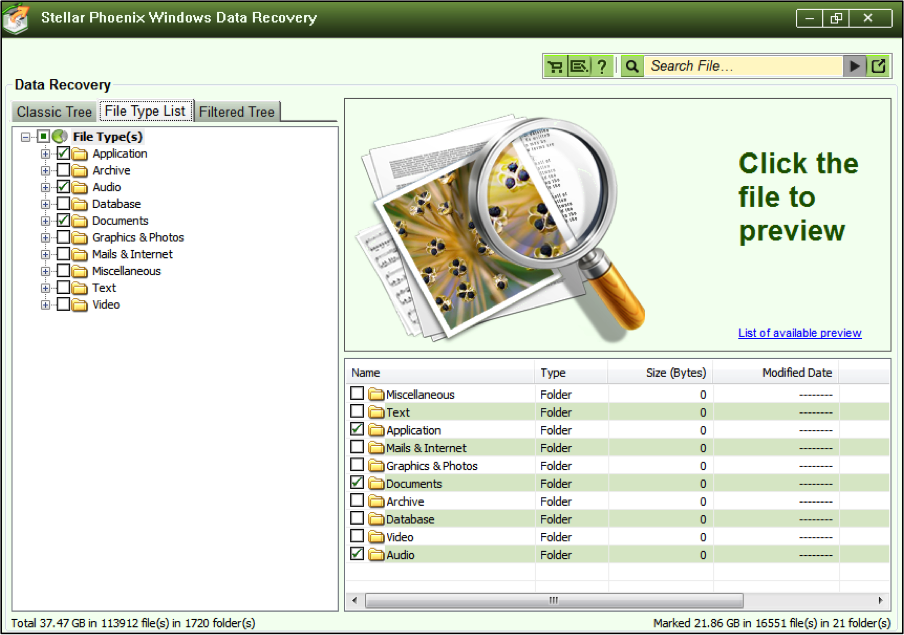
You may also select certain file types by clicking on the checkbox next to each folder within the tree view. Below you will see that only these format folders have been selected: Application, Audio, and Documents.
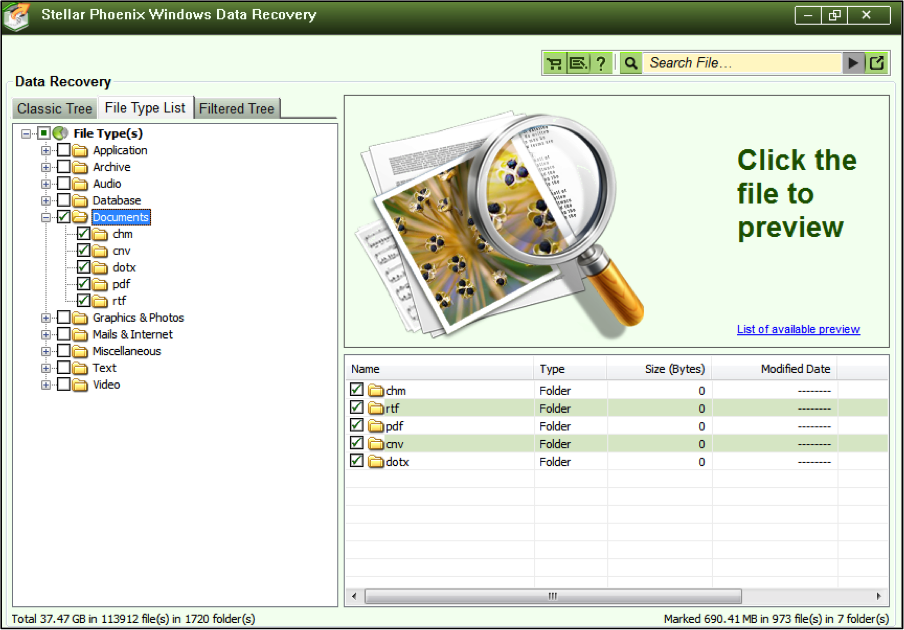
You will be able to see recoverable items broken down by format by selecting a file type from the tree view. As an example, when the Documents Folder has been expanded, additional folders are viewable within this directory for selecting individual formats (DOTX, PDF, etc.).
A file type folder such as Documents can be chosen to select all items with that type and format. You may also check only the formats that need to be restored.
The right side of the window may be used to make individual file selections. Selections can span across any file type or directory within the tree view. Just click on a format folder for a specific type and then check the box next to each desired item on the right side of the window.
After making all desired selections, click on Recover (Disk Icon) located at the bottom of the screen to choose where the information should be saved and the utility will take care of the rest for you.
Selections from the scanning results will be saved to the directory you have chosen for recovery. Stellar Phoenix Windows Data Recovery can locate and salvage any information you need from a PC or compatible device with ease. Your data will be safely tucked away on the PC used for scanning after the process has completed.





Reviews
There are no reviews yet.